 Use Triggers with Episerver Campaign
This
Connect to Episerver Campaign
A Recipient list authorization code creates a connection between Episerver Campaign and the Episerver Personalization Portal and adds triggerFireId to a user’s entry in the recipient list.
- hasheduserid. If you use hashed email addresses.
- email. If you use plain-text, non-hashed email addresses.
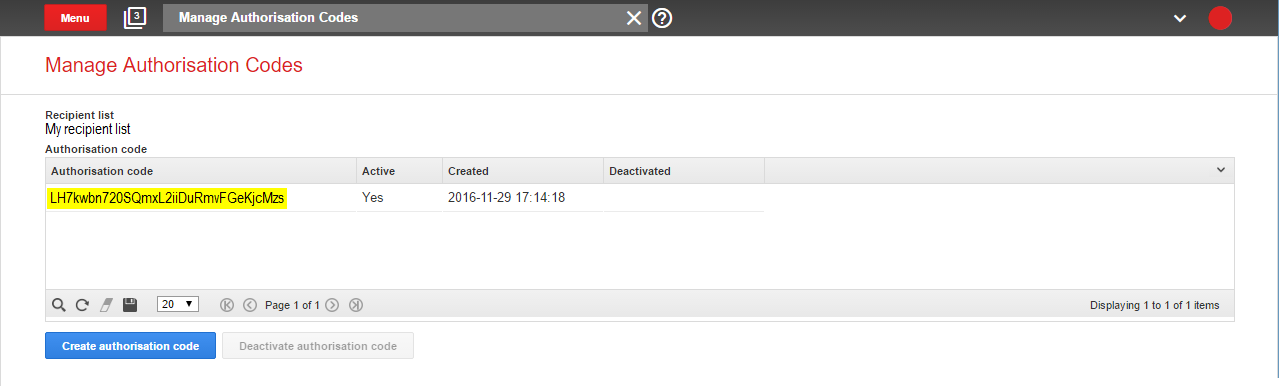
To retrieve the authorization code, use the following steps:
- In Episerver Campaign, from the main menu, go to Administration > API overview.
- Select Recipient lists to show its table.
- Select your recipient list from the table.
- Click Manage authorization codes.
- From the Manage Authorization Codes view, copy the authorization code.
- Paste the authorization code into the Personalization Portal, on the Triggers > New campaign > ESP connections page.
- Enter the connection name.
- Select Episerver Campaign as the name of your ESP.
- Click Test ESP connection.
- If the connection was successful, click Save ESP connection.


Link to a specific basket
Episerver can integrate links from an email recommendation to a particular basket of the recipient. To enable this feature, contact customer service.
For developer information, see Link to a specific basket on Episerver World.
Send triggered emails
To send messages using Triggers directly to users, set up your Episerver mailing campaign in the Episerver Campaign portal, then create a send-message action in Episerver Triggers.
Set up an email campaign in Episerver
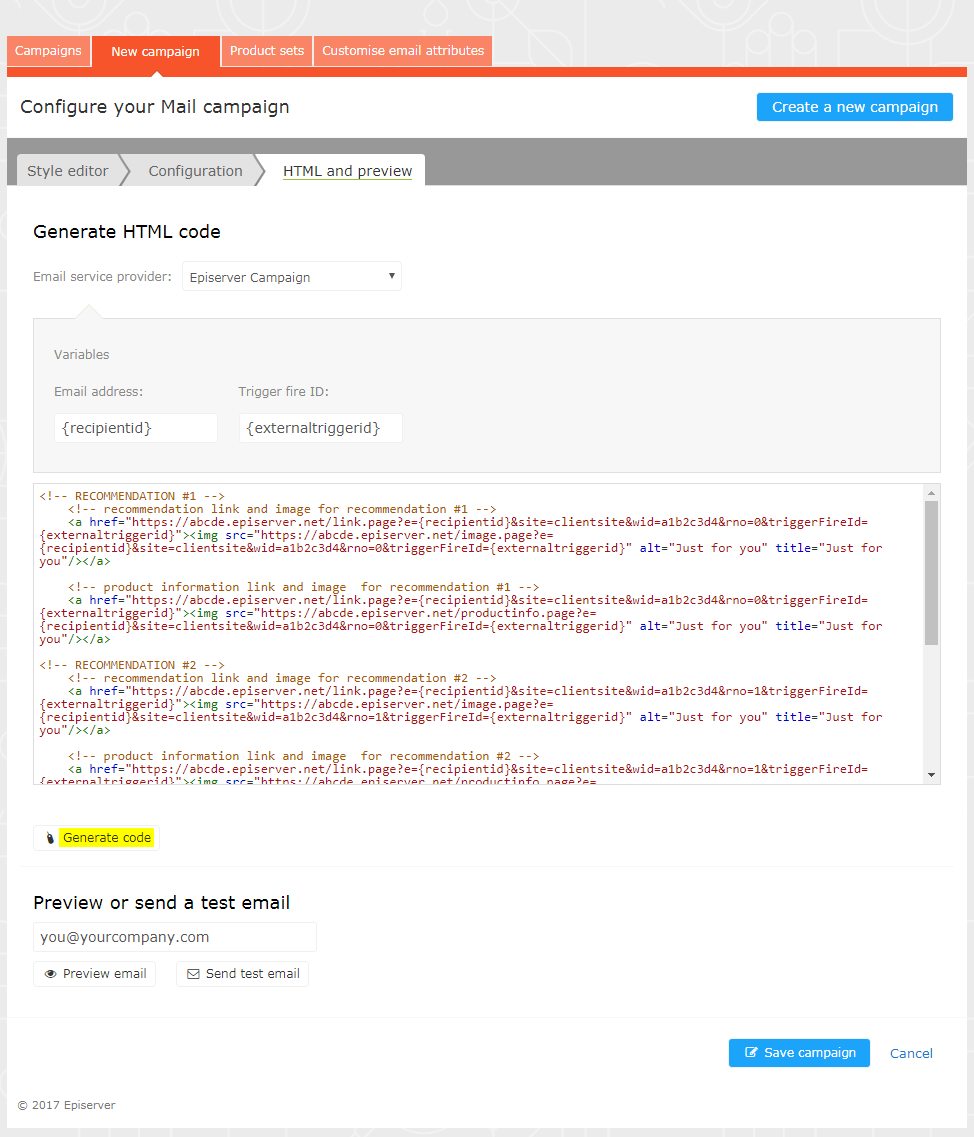
The following procedure shows how to generate HTML code to copy from Episerver Mail into a mailing in the Episerver Campaign portal.
- In the Personalization portal, go to Mail > Campaigns.
- Select and open your Mail campaign.
- Go to the HTML and preview tab.
- Select Episerver as the Email service provider.
- Click Generate code.
- Copy the HTML code displayed in the window.
- Go to Episerver Campaign.To create a new mailing in Episerver Campaign, go to Campaigns > Transactional emails and following the instructions in Transactional emails in the Episerver Campaign User Guide.
- From the main menu, go to Campaigns > Transactional emails.
- Select your email campaign.
- Click Edit.
- In the flow diagram that opens, click the campaign and click Edit (pencil icon).
- Click Edit content.
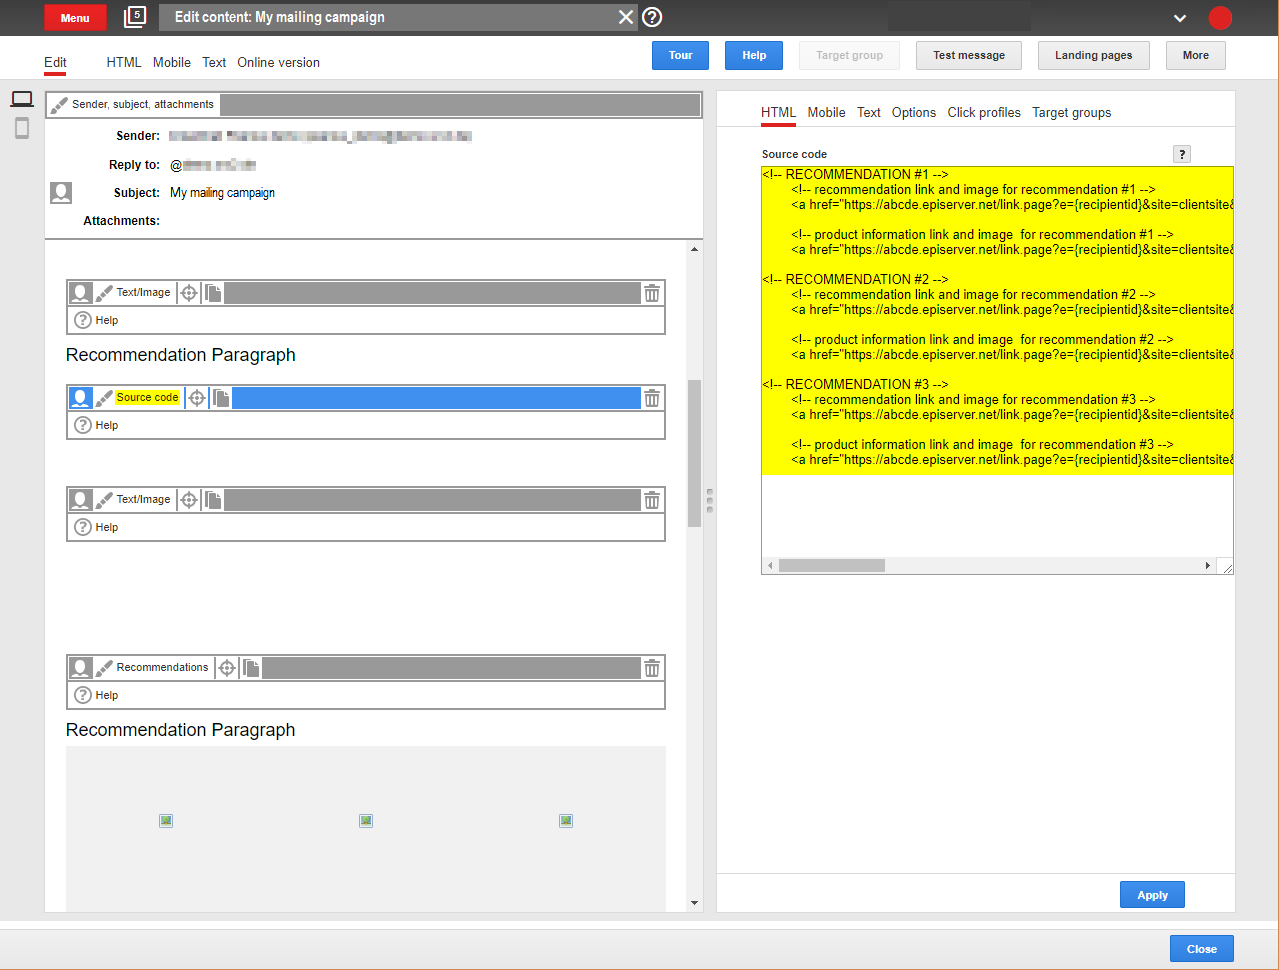
- In the editor, add or find the Source Code paragraph where you want to insert the Episerver recommendations. In the following image, a separate Text/Image paragraph was added above for the heading “Recommendation Paragraph”.
- Click Source code.
- Paste the HTML code (copied in step 6) into the right-hand panel:
- Click Apply.
Create a send-message action
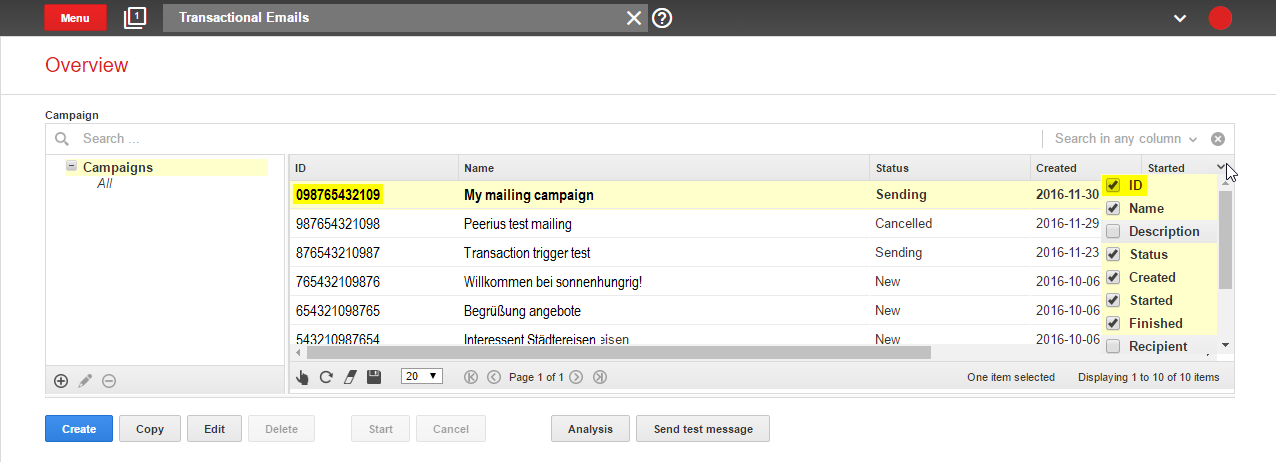
To send messages using Triggers directly to users, you need to provide the Mailing ID of the Episerver mailing campaign on the Triggers ESP action page. You can retrieve the Mailing ID by following these steps:
- In Episerver Campaign from the main menu, go to Campaigns > Transactional emails.
- Copy the Mailing ID for your campaign from the ID column.
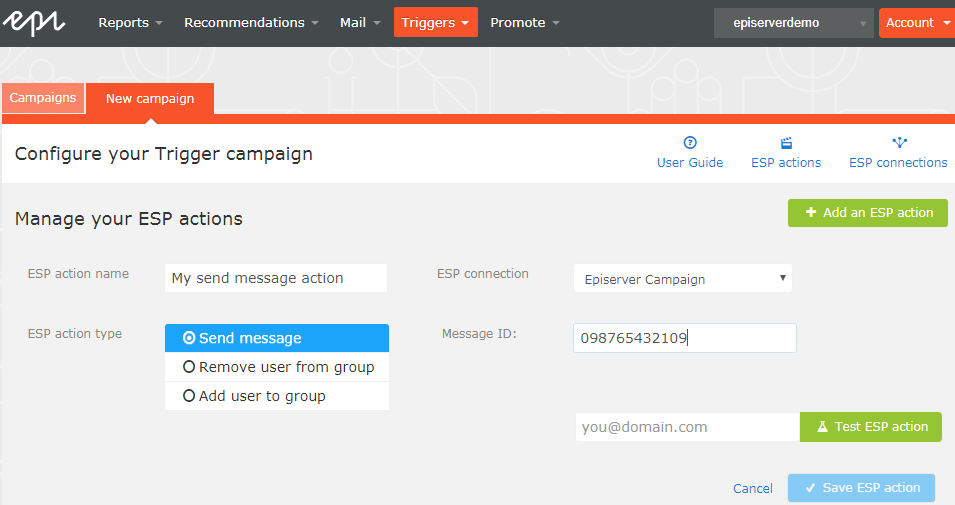
- In the Personalization Portal, go to Triggers > New campaign > ESP actions page and paste the Mailing ID.
- ESP action name. Enter the action name.
- ESP connection. Select the connection that you created earlier.
- ESP action type. Select Send message.
- Mailing ID. Enter the campaign Mailing ID.
- Test ESP action. Enter the email address of the email recipient and click Test ESP action.
- If the test is successful, click Save ESP action.
Create an Add user to group action
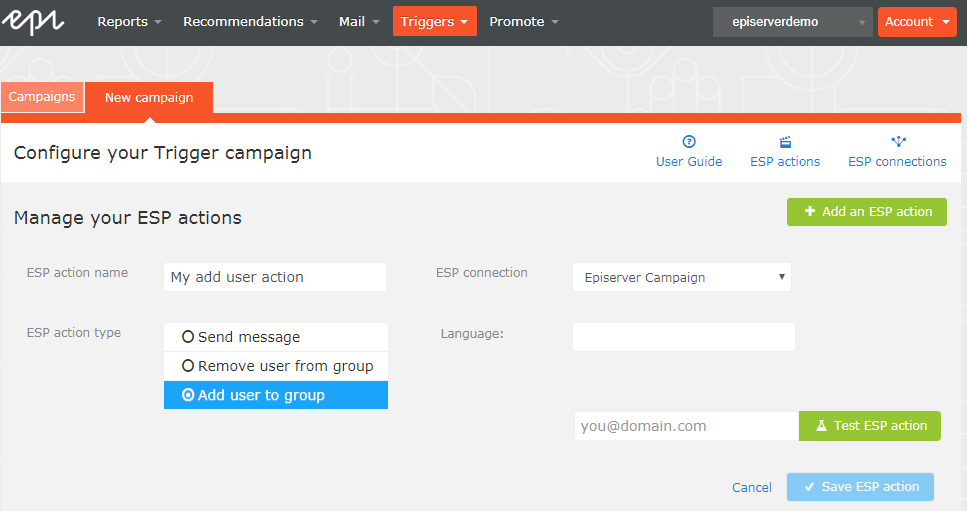
- In the Personalization Portal, go to Triggers > New campaign > ESP actions page.
- ESP action name. Enter the action name.
- ESP action type. Select Add user to group.
- ESP connection. Select the connection that you created earlier.
- Language. Enter the language code (such as en, de, sv) of the user. The language code configures email campaigns that feed the products into the email with the correct currency for each language, and ensures the titles are displayed in the correct language and the prices are in the correct currency. For ambiguous language codes, such as English (which can have different currencies in the US and UK, for example), Episerver Campaign performs an additional check on the user information to use the correct currency.
- Test ESP action. Enter the email address of the user and click Test ESP action.
- If the test is successful, click Save ESP action.
Create a Remove user from group action
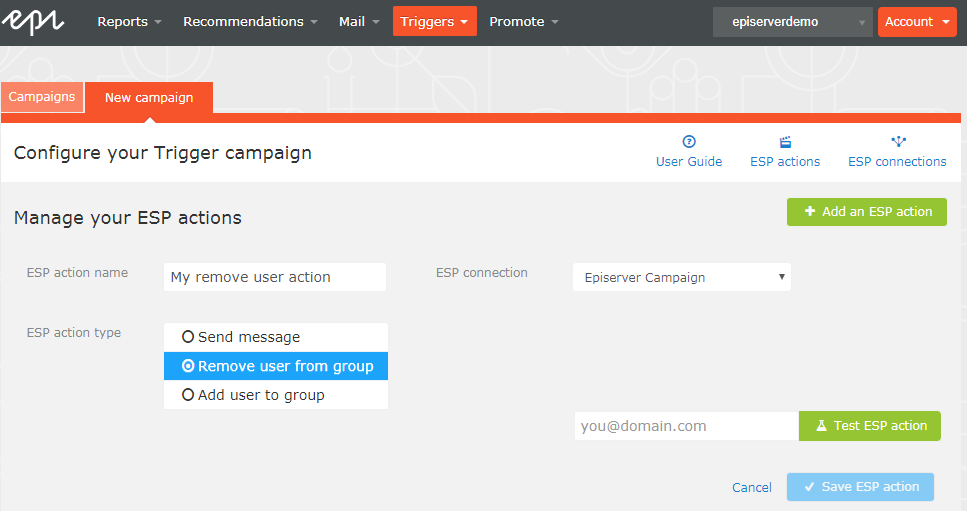
- In the Personalization Portal, go to Triggers > New campaign > ESP actions page.
- ESP action name. Enter the action name.
- ESP action type. Select Remove user from group.
- ESP connection. Select the connection that you created earlier.
- Test ESP action. Enter the email address of the user and click Test ESP action.
- If the test is successful, click Save ESP action.
 Need help? FAQs Glossary Site map Videos
Episerver User Guide 18-6 | Released: 2018-12-03 | © Episerver 2018 | Send feedback to us