 InsiteConnect for Avalara
InsiteConnect for Avalara
InsiteCommerce's integration with the Avalara Tax Calculator places the power of the Avalara Tax Calculator on your site. Avalara Tax Calculator includes the following features:
- Identifies product taxability
- Applies current, most up-to-date tax rules and regulations
- Verifies tax holiday status
- Applies sourcing rules (where taxable)
More information about the Avalara Tax Calculator product can be found at https://www1.avalara.com/us/en/products/sales-and-use-tax/avatax.html.
Prerequisites
To successfully implement the Avalara Tax Calculator for an InsiteCommerce (ISC) website, an Avalara AvaTax API account needs to be set up and configured. For help with this, reference Avalara's "Getting Started" guide: http://developer.avalara.com/api-documentation/avatax-15-api/getting-started
Enable and configure Avalara as the tax calculator
Settings
- Go to Admin Console > Administration > System > Settings.
- Search for Tax Calculator.
- Select Avalara from the menu.
- After selecting Avalara, a list of additional fields, under the heading of Avalara Tax Calculator, will display. These settings are described both below and within Admin Console.
Application settings
- Go to Admin Console > Administration > System > Application Settings
- Search for TaxCalculator.
- Edit Value to show Avalara. The default is Standard.Note: This setting is case sensitive.
- Click Save.
- Review the additional Application Setting values for Avalara shown below:
| Application Setting Name |
Description/Notes |
|---|---|
| TaxCalculator_Avalara_CompanyCode | The Company Code is created when creating an Organization within the Avalara account. This Code is used by ISC when calling the Avalara Api to point to a particular organization. |
| TaxCalculator_Avalara_DiscountFreightOnOrder | If True, the freight discount will be added to the total order discount for tax calculations. Freight charges should be taxable based on configuration settings in Avalara. The freight discount will only have a value when a promotion with result type "Discount Amount Off Shipping" or "Discount Percent Off Shipping" is applied. |
| TaxCalculator_Avalara_FreightTaxCode | The setting value in this field is added to the freight line in taxRequest as TaxCode. Based on Avalara, the Tax Code is a unique identifier associated with items or tax rules to create custom taxing situations. |
| TaxCalculator_Avalara_TaxServiceAccount |
The account number for your Avalara account. This will be a ten digit number. This information is provided by Avalara |
| TaxCalculator_Avalara_TaxServiceLicense |
The license key required to connect to Avalara. This will be a 16 character string. This information is provided by Avalara |
| TaxCalculator_Avalara_TaxServiceURL |
The URL to connect to the Avalara development or production service. This can be either the sandbox This information is provided by Avalara |
| TaxCalculator_PostTaxes |
True: This setting will post information back to Avalara False: This setting will not post information back to Avalara |
| The following are general tax settings found under the Taxes section heading: | |
| Application Setting | Description |
| TaxCalculator_Avalara_StorePickupShipCode | The ship via code defined here will determine if the order is a store pickup. If it is, taxes will be based on the store's address rather than the ship to address. |
| TaxCalculator_Avalara_UseOrderWarehouseForOriginAddress | If Yes, the address of the default warehouse will be used to determine the tax rate for the order. If No, the website's company address will be used. Default is No. |
| TaxCalculator_Avalara_IncludeCustomerFieldValue |
If a value is given for this setting, only customers with this value as their tax code will have taxes calculated. IMPORTANT: This setting was deprecated as of version 4.4.Review the related article on upgrading to version 4.4, as adjustments to the settings and code are required: Critical Considerations when Upgrading to InsiteCommerce v4.4
|
| The following settings are no longer applicable, as Avalara does not require them. | |
| Application Setting | Description |
| TaxCalculator_Avalara_TaxServiceUserName |
The field is no longer used by Avalara and was removed from the Admin Console in version 4.4. |
| TaxCalculator_Avalara_TaxServicePassword |
The field is no longer used by Avalara and was removed from the Admin Console in version 4.4. |
| Setting Name |
Description/Notes |
|---|---|
|
Company Code |
The Company Code is created when creating an Organization within the Avalara account. This Code is used by ISC when calling the Avalara Api to point to a particular organization. |
|
Discount Freight On Order |
If True, the freight discount will be added to the total order discount for tax calculations. Freight charges should be taxable based on configuration settings in Avalara. The freight discount will only have a value when a promotion with result type "Discount Amount Off Shipping" or "Discount Percent Off Shipping" is applied. |
|
Freight Tax Code |
The setting value in this field is added to the freight line in taxRequest as TaxCode. Based on Avalara, the Tax Code is a unique identifier associated with items or tax rules to create custom taxing situations. |
|
Account |
The account number for your Avalara account. This will be a ten digit number. This information is provided by Avalara |
|
License Key |
The license key required to connect to Avalara. This is a 16 character string provided by Avalara |
|
Send Live Transactions |
Determines if tax will be calculated using the development server or the live server. Default value: No |
|
Post Taxes on Order Submit |
If Yes, taxes will be posted to Avalara on order submit. Default value: No |
| Log Transactions | If enabled, transaction logs will be saved to the application log to assist with troubleshooting. To prevent large numbers of application logs this should only be used for debugging purposes. It will capture the call context, time of the request and the response. Default is value is No |
| The following are general tax settings found under the Taxes section heading: | |
| Setting | Description |
| Ship Code for Store Pickup Calculations | The ship via code defined here will determine if the order is a store pickup. If it is, taxes will be based on the store's address rather than the ship to address. |
| State for Store Pickup Calculations | If the order is being picked up at a store, as defined by the ship via code, this is used to determine which state that will be used to calculate state tax. |
| Store Pickup Postal Code | If the order is being picked up at a store, as defined by the ship via code, this is used to determine which tax locality to use to calculate local tax. |
|
Use Order Warehouse for Tax Origin Address |
If Yes, the address of the default warehouse will be used to determine the tax rate for the order. If No, the website's company address will be used. Default is No. |
| Non-Exempt Customer Tax Code |
If a value is given for this setting, only customers with this value as their tax code will have taxes calculated. IMPORTANT: This setting was deprecated as of version 4.4. Review the related article on upgrading to version 4.4, as adjustments to the settings and code are required.
|
| The following settings are no longer applicable, as Avalara does not require them. | |
| Setting | Description |
|
UserName |
The field is no longer used by Avalara and was removed from the Admin Console in version 4.4. |
|
Password |
The field is no longer used by Avalara and was removed from the Admin Console in version 4.4. |
Final steps
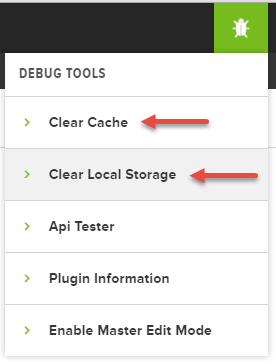
- After all the settings have been properly configured and before you test, clear both the Cache and Local Storage, which found within the Debug menu.
- The last step in the setup is to validate the connection using Test Connection:

If the connection test fails, validate your Company Code, Account, and License Key have been entered correctly and retry. If the connection still fails, connect with Avalara's support to validate your account information.
Viewing taxes
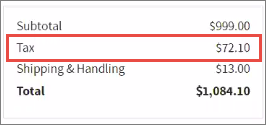
There is an optional Setting that can be configured to display the Tax within the Cart during the check out process: Show Tax &'shipping Amount in Cart.
There is an optional Website Setting that can be configured to display the Tax within the Cart during the check out process: ShowTaxAndShippingInCart.
- Go to Admin Console > Administration > System > Settings.
- Search for Show Tax &'shipping Amount in Cart.
- Change the value to display YES. The default is NO.
After enabling the setting, to see the tax on a product, a customer needs to be signed into the website, as Avalara requires customer Billing and Shipping information to correctly calculate the tax amount. This calculation is based on configurations made within Avalara.
Adding tax codes to customers or products
Tax codes can be assigned to customers and/or products. There are numerous business and legal reasons to apply tax codes, so we will leave making those decisions up to you. Avalara does provide a default set of specific tax codes (https://developer.avalara.com/avatax/dev-guide/product-taxability) that can be used or you can simply use the NT (non-taxable) tax code indicate a customer or product is not taxable. Once the tax codes have been identified, use the following steps to apply the codes to the relevant customers or products. This can be done manually, as shown below, as a part of a customer or product import, or the codes are assigned within your ERP and would be brought in as a part of a product integration job.
Entering the tax code for products
- Admin Console > Catalog > Products.
- Click Edit for the desired product.
- Click the Details finger tab.
- Scroll down to the Tax Information section.
- Enter the tax code in the Tax Code 1 field (the Tax Code 2 field is only used in association with the Dual Tax Calculator).
- Click Save.
Entering the tax code for customers
- Admin Console > Catalog > Customers.
- Click Edit for the desired customer.
- Click the Details finger tab.
- Scroll down to the Billing section.
- Enter the tax code in the Tax Code field.
- Click Save.
Accessing the Avalara website for admin functions
Below are the URLs for manually accessing the Avalara website for Admin Functions:
- Test - https://admin-development.avalara.net
- Production - https://admin-avatax.avalara.net