 Creating a new theme
Summary
This article explains the process for creating a new theme for InsiteCommerce. To create a theme, you need to complete the following steps:
- Create the theme project
- Assign the theme to a website
Before You Start
Make sure that you have completed the following:
- Download and install InsiteCommerce Cloud SDK (see https://support.insitesoft.com/hc/en-us/articles/360025291711-InsiteCommerce-Cloud-Environment-Setup-for-Developers for instructions)
Create Theme Project
- In the directory where the SDK was installed, go to the ~\src directory.
-
Run the createTheme.ps1 PowerShell script. Use the name
of your theme as the first and only argument.
.\createTheme.ps1 MyTheme
-
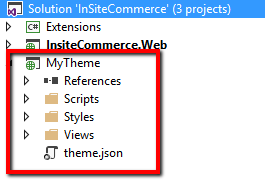
Use Visual Studio to open the InSiteCommerce.sln solution
file. The PowerShell script created a separate project for your theme
and named it using your theme name.
- Build the solution.
Assign Theme to Website
- Log into the Admin Console.
- Go to Websites in the left navigation.
- Click Edit next to the Website to which you want to assign your theme.
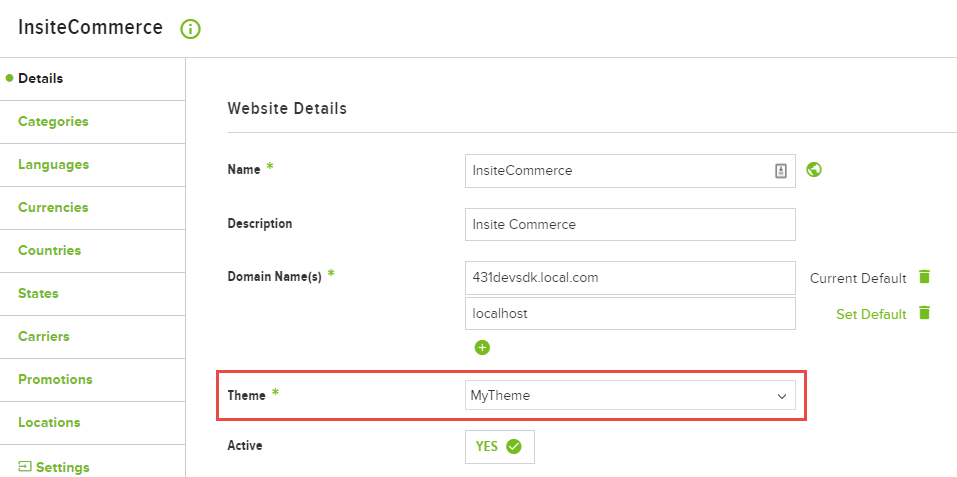
-
On the Details finger tab, use the Theme drop-down
to select your theme.
- Click Save.
- Go to the Storefront for the Website. The Storefront is now using your theme:
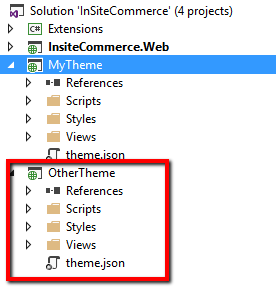
Multiple Themes
Each website in InsiteCommerce can only be assigned a single theme, but the platform can handle multiple themes. To add another theme to the platform, simply repeat the process above starting at Create Theme Project. For each new theme, remember to use a unique theme name.
Summary
This article explains the process for creating a new theme in InsiteCommerce. To create a theme, you must accomplish the following steps:
- Create the theme directory
- Configure the theme loader
- Assign the theme to a Website
Before You Start
Make sure that you have completed the following:
- Download and install the InsiteCommerce 4.3.1 SDK
Create Theme Directory
- In Visual Studio, open the InSiteCommerce.sln solution file.
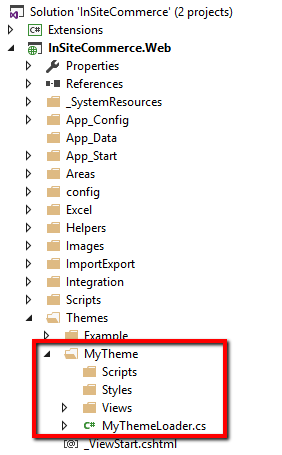
- Find the Example directory under the ~\InSiteCommerce.Web\Themes directory.
- Copy the Example directory.
- Rename the copied directory to the name of your theme.
-
In your theme directory, rename the ExampleThemeLoader appropriately.
Configure Theme Loader
- Open the theme loader for your theme.
-
Uncomment the class declaration portion that implements
IThemeDtoLoader.

- Move down to the GetTheme method to configure your theme.
- In the ThemeDto object, change the Name property value to match your theme name.
- Build the solution.
Assign Theme to Website
- Log into the Admin Console.
- Go to Websites in the left navigation.
- Click Edit next to the Website to which you want to assign your theme.
-
On the Details finger tab, use the Theme drop-down
to select your theme.
- Click Save.
- Go to the Storefront for the Website. The Storefront is now using your theme.
Multiple Themes
Each website in InsiteCommerce can only be assigned a single theme, but the platform can handle multiple themes. To add another theme to the platform, simply repeat the process above starting at Create Theme Directory. For each new theme, remember to use a unique theme name.
Creating a new theme requires creating a theme folder with the framework hierarchy that the theme provider recognizes. This is made up of:
- Sub folder (theme name) in the Themes folder
- themes.config for theme inheritance
- Theme folder structure of:
- Images - used for images specific to a theme
- Scripts - JavaScript specific to the theme or AngularJS overrides
- Styles - used for CSS styling of the custom theme
- Views - contains the pages, page templates, directives, and widget views
The theory of InsiteCommerce themes has remained consistent since version 3 however now instead of adding MVC views for each page the developer now creates directives, pages, or widgets to override base theme functionality.
Custom javascript/typescript files in this folder and subfolders will be added to the global.min.js bundle, after the default scripts. Add files to custom.xml if you need them to be included before the others (for base classes for example).
-
Create a new sub folder with the name of the theme in the Theme folder:
- Name: MyCompany
-
Create the corresponding folder hierarchy required for the Theme Provider:
- Sub folders: Images, Scripts, Styles, and Views
- Copy the theme.sample.config file to the new Theme folder and rename to theme.config.
-
Go to the Admin Console. If the path to your InsiteCommerce
instance is http://isc42.local.com then the path would be
http://isc42.local.com/admin:
- Username: Admin
- Password: Password1 (default)
- Go to Admin Console > Websites.
- Search for the desired site and click Edit .
- Click the Settings finger tab.
- Search for the Website Setting called Theme and set the Value to the name of your custom theme (such as MyCompany) and accept the changes.
- Go to the InsiteCommerce website and it will now be using your custom theme.