 Sharing lists with multiple customers
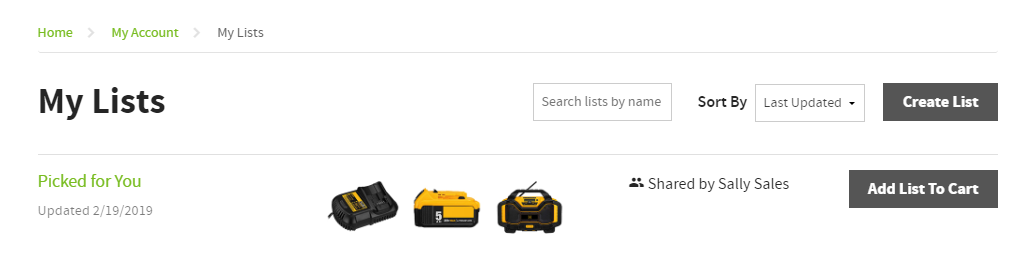
You can create, manage and share lists with multiple customers from the Admin Console. This lets you target marketing efforts by sharing lists with one or multiple customers to promote products or streamline access to their most-purchased products. Customers will see lists shared from the Admin Console on their My Accounts > My Lists page, including who created and shared the list. Customers will not be able to share, edit or delete this list.
Create a list
To share a list with multiple customers, you first need to create it in the Admin Console.
- Log in to the Admin Console.
- Go to Marketing > Lists.
- Click +?List to add a new list.

- Enter the list Name, Shared By and Description information on the Details finger tab.
- Click Save.
The list management table only shows lists that have been created in the admin console.
Add individual products to a list
You can add products to the list one at a time.
- Select the Products finger tab.

- Click + List Product to assign products individually to a list
- Select a product from the Product drop-down list. These fields only include products that are available for addition to this list.
- Select the appropriate Unit of Measure.
- Enter a value in Qty Ordered.
- Enter a value in Sort Order based on where you want the product to appear in the list.
- Click Save. Repeat these steps to add more products individually.
Add multiple products to a list
You can use the import functionality to add multiple products to the list at one time.
- Click the Import icon to add multiple products at once.
- Select Wishlist Products from the What would you like to import? drop-down list.
- Click Download Template to start from a template with columns for List, Product, Unit of Measure, Qty Ordered and Sort Order. Fill in the product information and save your spreadsheet.
For more information about importing, see the Importing and Exporting Data and the Working with the Import Template articles.
- Click Choose File to search for and select your import spreadsheet.
- Click Import.
Assign or unassign customers to a list
You need to assign customers to the list for it to appear on their My Accounts > My Lists page.
- Select the Customers finger tab.

- Click Assign Customers or Unassign to add or remove individual customers from this list.
- Select the customer name from the list or search for a customer name.
- Click Save.
Any website user who has access to these customerscsn see this list on your website.