Enable Value Added Tax (VAT)
In the European Union, VAT is charged by all VAT-registered companies to sellers within the same country. Sales to other countries do not require VAT. Enable and configure VAT on your Optimizely B2B Commerce website to meet this tax requirement.
The general process to use VAT on your B2B Commerce site is to enter your VAT codes and VAT rates, then turn the Enable VAT setting on to show VAT fields in the Admin Console and VAT calculations on your site. Configure two other tax settings, including selecting the VAT tax calculator and shipping VAT code, after you enable VAT.
VAT display in the Admin Console
Fields for VAT will appear on product, country, customer and order history records in the Admin Console. You need to first enable master edit mode to see these fields.
-
Product - Go to Catalog > Products. Click the Edit icon for a product and scroll down on the Details finger tab to the Tax Information section. You will see a VAT Code drop-down list.
-
Countries - Go to Administration > Localization > Countries. Click the Edit icon for a country and scroll down on the Details finger tab. You will see a Default VAT Code drop-down list.
-
Customer - Go to Customers. Click the Edit icon for a customer and scroll down on the Details finger tab to the Billing section. You will see a Default VAT Number text box.
-
Order History - Go to Sales > Order History. Click the View icon for an order. Click the Column & Display Order icon and select the Tax Rate and Tax Amount columns to view this information in the Order Lines section. These columns are sortable.
VAT display on the Storefront
Labels will appear to customers next to calculations indicating VAT is excluded, included or both. Tax calculations with our without VAT appear on the Product Detail page, the Product List page, the Product Comparison page, as well as in the Product Carousel widget A pre-configured content holder ISC_Content user roles may use to add content to website pages without having to develop page elements..
Sort by Price
When customers sort products by prices on your site, the system should sort based on what's selected for the Display Prices with VAT setting as follows:
-
Display With VAT > Sort by Price (Inc. VAT)
-
Display Without VAT > Sort by Price (Ex. VAT)
-
Display With and Without VAT > Sort by Price (Inc. VAT)
Checkout
VAT-related fields also display as codes and calculations on other pages:
-
VAT Number field - maps to the customer's Default VAT Number on Review & Submit, Order Details, Invoice Details and Saved Orders.
-
VAT Tax Rate field - shows as a percentage of the order total in the Subtotal order block that appears on Review & Submit, Order Details, Invoice Details and Saved Orders.
-
VAT Pricing Details field - displays price details based on the option selected in the Display Prices with VAT setting for the cart, order and invoice lines that appear on Review & Submit, Order Details, Invoice Details and Saved Orders.
RFQs
Salespeople do not see VAT calculations when preparing quotes (RFQs). After a customer submits a quote and it is approved, the quote displays pricing to the customer based on the option selected in the Display Prices with VAT setting. Each line calculates the subtotal of the quoted products using the quantity and VAT rate. When customers check out with the submitted quoted price, the VAT price also displays through the checkout process.
Requisitions
Requisition approvers will see VAT based on the option selected in the Display Prices with VAT setting when viewing requisitions and pricing under MyAccount > Requisitions. Each line calculates the subtotal of the requisitioned products using the quantity and VAT rate.
Enable master edit mode
You need to first enable master edit mode to see VAT-related menu options in the Admin Console, as well as VAT fields for products, countries, customer and order history records.
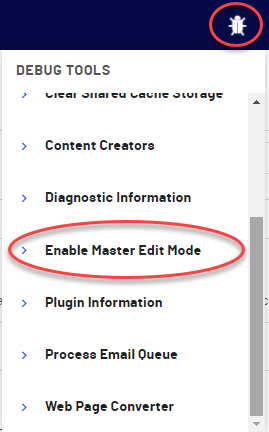
- Click the Debug icon on the top navigation bar.
- Click Enable Master Edit Mode.
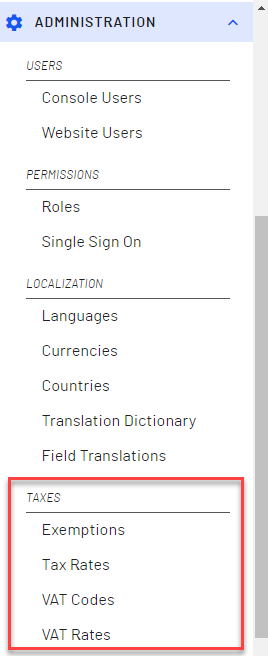
- Go to Administration > Taxes. If you see the Taxes menu with the VAT Codes and VAT Rates options, you can continue with setting up VAT.
VAT codes
Use the VAT Codes page to set up specific tax codes to use later when creating VAT rates.
- Go to Administration > Taxes > VAT Codes.
- Click + VAT Code to add a new VAT code.
- Enter a name for the code in the Name field.
- Enter a short description for the code in the Description field.
- Click Save.
VAT rates
Use the VAT Tax Rate page to identify specific VAT tax rates by country/VAT Code combination.
- Go to Administration > Taxes > VAT Rates.
- Click + VAT Rate to add a new VAT rate.
- Select an ISO alpha-2 Code or Name in the Country field.
- Select a VAT code from the VAT Code drop-down list.
- Enter a positive decimal number in the Tax Rate field.
- Set the Taxable toggle to ON or OFF.
- Click Save.
Enable VAT
- Go to Administration > System > Settings and search for Enable VAT.
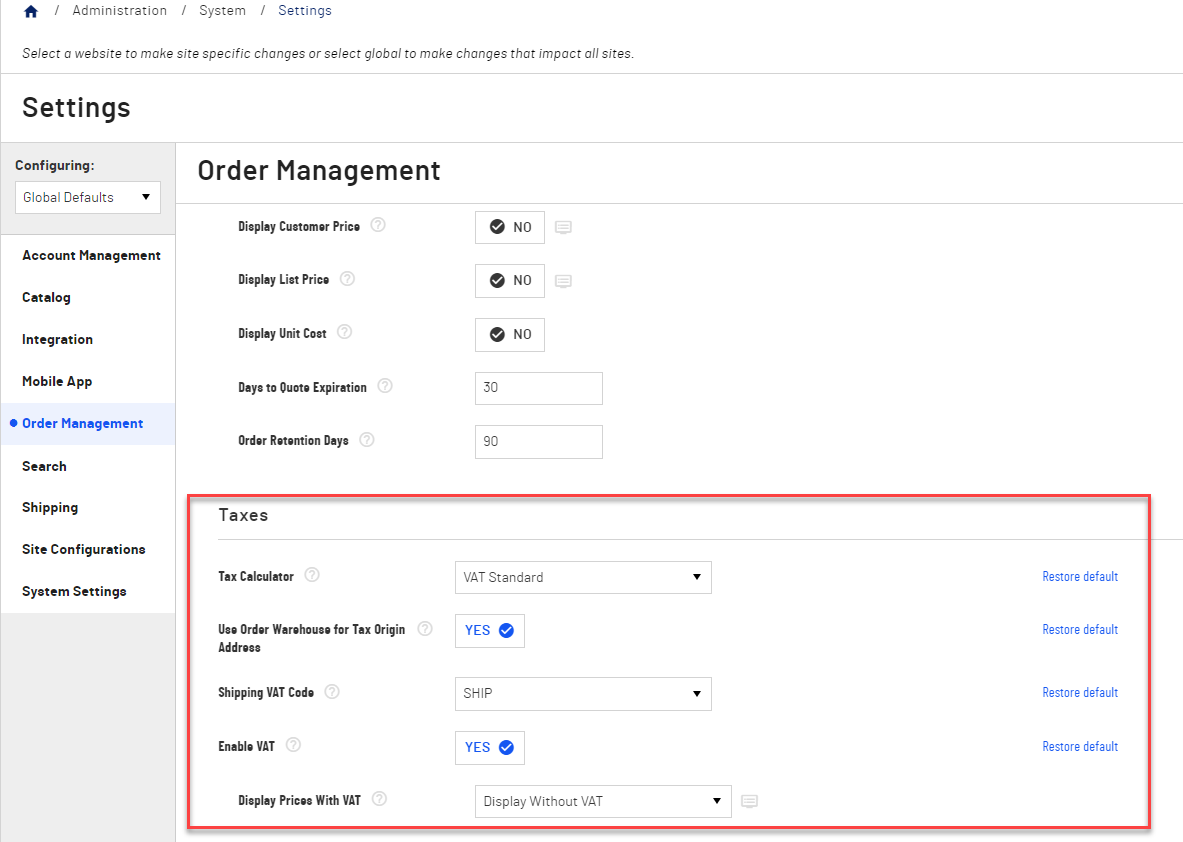
- Set the Enable VAT setting to YES. When set to YES, this setting allows use of the Value Added Tax fields and calculate using VAT logic. The default value is NO.
- Select an option from the Display Prices with VAT drop-down list. This setting applies to pages where the pricing for a product is shown and whether it should display with or without VAT included, or both. The default value is Display Without VAT.
- Click Save.
Select the VAT standard calculator
The VAT standard calculator performs calculations to determine taxes based on the VAT code on the products and the shipping country (or the default VAT code for the country), and the VAT code and VAT rate for the order and ship-to location. If there is no context for the ship-to location, it uses the originating warehouse. This calculation is done at the extended line level (qty*price)*(1+VatRate) and rounds to the nearest cent or pence using standard rounding rules (.005 round up or.0049 and below round down).
- Go to Administration > System > Settings and search for Tax Calculator.
- Select VAT Standard from the Tax Calculator drop-down list. This setting determines which tax calculator to use for calculating taxes. The default value is Standard.
- Select an option from the Shipping VAT Code drop-down list. This setting sets the tax code that will be used to calculate VAT on the shipping portion of the order. If you leave this field blank, shipping VAT is calculated based on the products in the order.
- Click Save.