 Working with pricing
Optimizely B2B Commerce has a number of options to control the pricing of products. There are also options for complex pricing structures which involve pricing at different quantity breaks or pricing for different customers.
When working with pricing, it is important to consider how pricing is displayed to guest users. The Website AccessWebsiteNavigation setting controls what users have access to prior to signing into the website. For more information on this topic, review this article: Working with guest access on the website.
The following are the primary approaches for implementing Pricing:
Additional features to consider when working with Pricing include:
- Sales Pricing - This is commonly implemented with Basic Pricing
- Quantity-Break Pricing - This allows you to display Quantity-Break Pricing on the website.
- $0 Pricing - B2B Commerce allows you to configure $0 pricing for products,
- Site Messaging for Invalid Pricing - B2B Commerce supports configurable messaging for products with invalid pricing.
Basic pricing
Basic Pricing is essentially one price for all customers, often implemented in a B2C site. Configuring Basic Pricing involves setting a price directly within the Admin Console or via integration.
List pricing
List Pricing is essentially one price for all customers, often implemented in a B2C site. Configuring Basic Pricing involves setting a price directly within the Admin Console or via integration.
Use the following steps to configure the basic list price within the Admin Console:
- Go to Admin Console > Catalog > Products.
- Search for the product.
- Click Edit on the product record.
- Find the Basic List Price field under the Details finger tab. During an the integration of the ERP with Optimizely Commerce, it is common to set the Basic List Price. To modify the price, click into the field and edit the existing value.
- Click Save.
Sales pricing
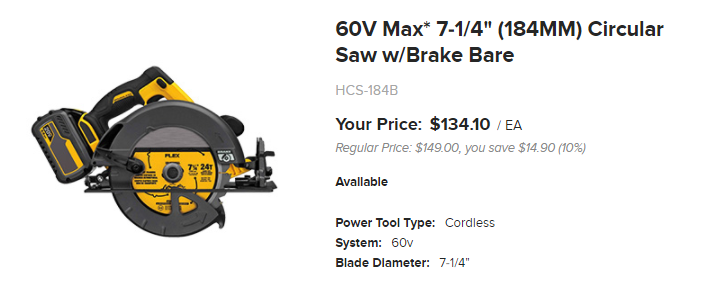
Sale prices, commonly used with the Basic PricingList Price pricing service, can be set for a product on the Product Details page of the Admin Console. The value entered into the Basic Sale Price field supersedes the price that is listed for the Basic List Price. The sale price is controlled by setting a schedule for the sale price using the Basic Sale Start Date and Basic Sale End Date fields. The sale price is then displayed on the website along with the Basic Price, which is struck out. The sale price is then displayed on the website and the basic price, along with the amount saved and percentage saved are displayed in italics. Displaying the savings amount and percentage saved is enabled by default using the Show Savings Amount and Show Savings Percent settings. These settings can be configured uniquely per website using the .
Use the following steps to set the sales price for a product.
- Go to Admin Console > Catalog > Products.
- Search for the product record you want to modify.
- Click Edit on the product record.
- In the Details tab, find the Basic Sale Price field. The value is the amount that is set to reflect the new price. To modify the price, click into the field and enter a value.
- Under Basic Sale Start, click the Calendar and Time buttons to select the start date and time of the sales price.

- Under Basic Sale End, click the Calendar and Time buttons to select the end date and time of the sales price.

- Click Save.
There are two ways to change the basic price of a product to a sale price:
- Through a Basic Sale Price field
- Through a Promotion.
The Basic Sale Price field may be used more often for instances such as clearance items or a special purchase from a vendor. Promotions allow for sales prices, but also track client's spending patterns and habits. Neither choice is mandatory and solely dependent upon the needs of the user.
Price matrix
The Price Matrix is a feature that is designed to create flexible pricing options based on customers and products. This is accomplished by employing logic that creates a hierarchical pricing structure, which can be used by many accompanying ERPs.
The Price Matrix creates a generic construct that could be used for storing complex pricing information across various ERP systems. It is intentionally non-normalized data to create a data structure that can perform the calculations with minimal latency. It does have its limitations, such as a maximum of 10 price breaks.
Each ERP or custom application of the matrix can use different data in specific fields (RecordType, CustomerKeyPart, ProductKeyPart, CalculationFlags) as needed to accommodate the pricing functions.
Price filtering is not available when using Price Matrix.
Processing steps
The Price Matrix uses a logical process flow to calculate pricing for products. It uses a generalized approach to pricing with adjustments depending on the ERP.
The general process flow for pricing is as follows:
- Gather all appropriate records from the B2B Commerce Price Matrix Table
- Organize potential price records into a hierarchy, from most specific to most general (also applies to warehouse, currency and unit of measure)
- Identify the first record within the hierarchy that matches the specific pricing scenario
- Calculate pricing utilizing the price record identified above
- Compare the calculated price to the sales price
- Return the lowest value between the calculated or sales price
Quantity-break pricing
B2B Commerce provides the option to display quantity-break pricing on the website. This functionality allows users to have a visual cue for qualifying quantity break prices.
Quantity based pricing is available for both Price Matrix and Real Time implementation approaches. In order for the Quantity Based Pricing table to display on the website for the Real Time implementation, quantity break points and pricing are required as a part of the Real Time call response data. For the Price Matrix implementation, the Quantity Based Pricing table will display on the website if the quantity break points and pricing are found within the B2B Commerce Price Matrix table.
Quantity-break pricing setup
To use the Quantity-Break Pricing functionality for the Price Matrix implementation, several conditions must be set in the Admin Console. The steps are listed below. Some, if not all, settings will already list the correct value.
- Go to Admin Console > Administration > System > Application Settings.
- Set AutoCalculatePrice to True.
- Set UseBasicPricing to False.
- Set ERP_PricingStoredProcedure to PriceCalculator_Generic.
- Set PriceCalculator to Generic.
- Go to Admin Console > Administration > System > Settings.
- In the search box, enter Pricing Service.
- Look for and select Pricing Service
- Selecting any of the choice other than List Price, will allow the Price MatrixPrice Break data needs to be available in order for it to display on the website.
In addition to these Application Settings, a Price Matrix record for the product must be set up for the Quantity-Break Pricing to display. Price Matrix records are typically created through integration. See the article on Configuring the Price Matrix for more information.
Quantity-break pricing display
Items set up with Quantity-Break Pricing will display a link titled Quantity Pricing. Hovering over the link will display a box that shows the quantity pricing breaks, along with the savings percentage.
Real-time pricing
On e-commerce websites, it often is necessary to provide customers with pricing and inventory information in real time. Use real-time pricing or inventory to account for any pricing or inventory changes made in the ERP throughout the day, rather than waiting for the next refresh. The B2B Commerce integration framework can be configured to enable real-time integration jobs. So, rather than running the pricing refresh or inventory refresh job on a recurring schedule, the platform can be configured to run the integration jobs every 500 milliseconds. B2B Commerce has a real-time pricing plug-in architecture that developers can use to call any pricing service or API. Real time pricing calls are made as users go through the website, but are cached to improve performance. Utilizing AJAX web development technique, pricing information is loaded asynchronously from the rest of the page, allowing the users to quickly navigate the website, and not have to wait for pricing information to load.
If using real-time pricing, the maximum value for the Price Sort Maximum setting in the Admin Console is 100. Any greater value disallows price sorting entirely. The number of products in the results must also be less than or equal to the value of the setting for the Sort by Price option to display. If a user selects Sort by Price, the server calculates the prices and sorts the results.
$0 pricing
When product pricing is set to $0, you can make that pricing valid for a given product in B2B Commerce. Doing so will prevent an error message for that product from appearing when the product is added to the cart. To enable $0 pricing, follow these steps in the Admin Console:
-
Go to Admin Console > Catalog > Products.
-
Search for the product for which you want to allow $0 pricing.
-
Click Edit on the product record.
-
Find the Pricing section under the Details finger tab.
-
Set Allow 0 Value Pricing to Yes.
B2B Commerce handles promotional items with $0 pricing differently from regular items with $0 pricing. If a website user adds a promotional item with $0 pricing to the cart, the user will still be able to complete the order successfully. This is true even if $0 pricing is not enabled for the product.
Site messaging for invalid pricing
B2B Commerce allows you to configure a site message for products with invalid pricing (rather than using the default message). To configure the site message for invalid pricing, follow these steps:
-
Go to Admin Console > Administration > System > Site Messages.
-
Click Edit next to the site message name Cart_InvalidPrice.
-
Enter the new site message in the Message field.
-
Select the Website Target. (The default is All Websites.)
-
Click Save.