Optimizely B2B Commerce business users have the option to install either basic Google Analytics or a Google Tag Manager container on their various websites and domains by using three simple Website Settings. The steps to install Google Tag Manager are below.
You need the ISC_Implementer role to make these changes.
Locate the Google Tag Manager Container ID
Using the out-of-the-box Google Tag Manager implementation will allow you to provide the unique Google Tag Manager Container ID (often referred to as a "GTM ID") and the domains in which you want that tracker installed, and B2B Commerce will place the Google Tag Manager snippet with your provided GTM ID in the correct location across all pages on your site, as well as install the data layer for future use. If you are having trouble locating your container ID, see the Google Support article.
Update the Google Tracking Settings
There are three settings responsible for the configuration of Google Analytics. For Spire sites, be sure to add the domain name (non-url) to the GTM settings.
|
Name |
Value |
|---|---|
|
Google Tracked Domains |
A list of domain names for which Google Tracking is enabled. While this could be for any account, it is normally set for B2B Commerce Analytics purposes. Be sure to include the fully qualified domain, which is anything between the https:// and the next /. For example, www.mydomain.com. |
|
Google Tracking Account ID |
Either the UA ID of the Google Analytics tracker you'd like to install, or the GTM ID of the Google Tag Manager Container you'd like to install |
|
Google Tracking Type |
Either 'GoogleAnalytics' or 'GoogleTagManager' depending on which tracker you have decided on using (see Google_TrackingId above) |
- To update these settings, go to the Admin Console > Administration > System > Settings.
-
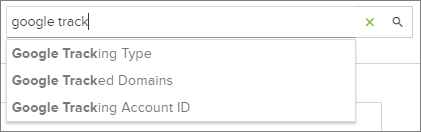
In the Search Box, enter "google track". The three settings will display.
-
Notice that the System Settings finger tab is highlighted,
showing that the three settings are located within this section.

- Click the System Settings finger tab.
-
Under the Analytics section, all three Google Analytics
settings are displayed. (If desired, click the green x in
the search box to clear the yellow highlighting).
 IMPORTANT: Be sure to select the correct target for which the settings will be applied:Global (all sites) or a specific website.
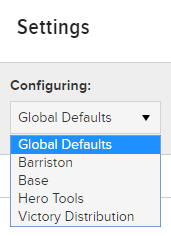
-
If any websites already have a unique setting that is not the Global Default,
this icon
 will be displayed.
Note: Selecting Global Defaults and updating settings will not override any unique website focused settings.
will be displayed.
Note: Selecting Global Defaults and updating settings will not override any unique website focused settings. - Update the setting fields: choose the Tracking Type, identify the Tracked Domains (click Add More to add additional domains), and enter your Tracking Account ID.
Enable applicable settings in Google Analytics
To capture the eCommerce data, as well as the Custom Dimensions, you will need to enable both in the settings of Google Analytics.
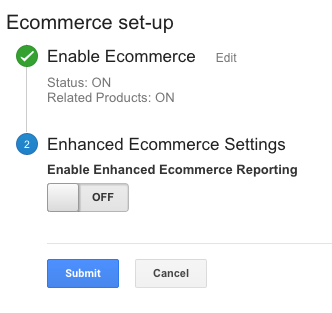
Enabling eCommerce in Google Analytics
Log into the applicable Google Analytics view you are using, and go to the Admin panel. Under the Ecommerce Settings turn on the Status slider under Enable Ecommerce. You may leave the remaining options off. You will need to repeat this step for all views you wish to capture eCommerce data.
Enabling Custom Dimensions in Google Analytics
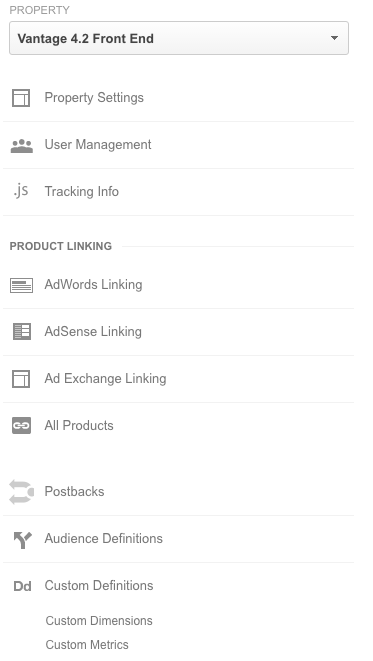
To capture and use Custom Dimensions in Google Analytics reporting, you must first enable them on the Google Analytics Property settings. To do so, go to the Custom Definitions > Custom Dimensions section of the Property Settings in Google Analytics.
Add Custom Dimensions with the scope as listed below.
The Index number of both of your Custom Dimensions, and ensure they align with how they are configured on your Google Analytics tag inside Google Tag Manager.
Optional: Site Search Tracking
Optionally, you may also choose to enable Site Search Tracking in Google Analytics. Site Search Tracking lets you understand visitor engagement metrics regarding the search box on your site. Metrics such as percentage of sessions with search, all keywords that have been searched and more are captured with this setting enabled.
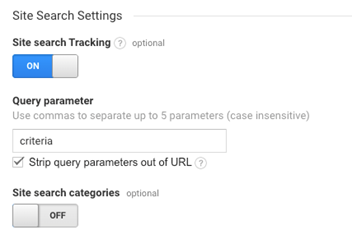
To enable this, go to the View Settings in the Google Analytics View you are using on your B2B Commerce website. Scroll to the bottom of the page, use the slider to turn on the Site search Tracking option, and enter criteria as the Query parameter. Be sure to Save your changes. You will need to repeat this process for all Views you wish to capture Site Search data for.
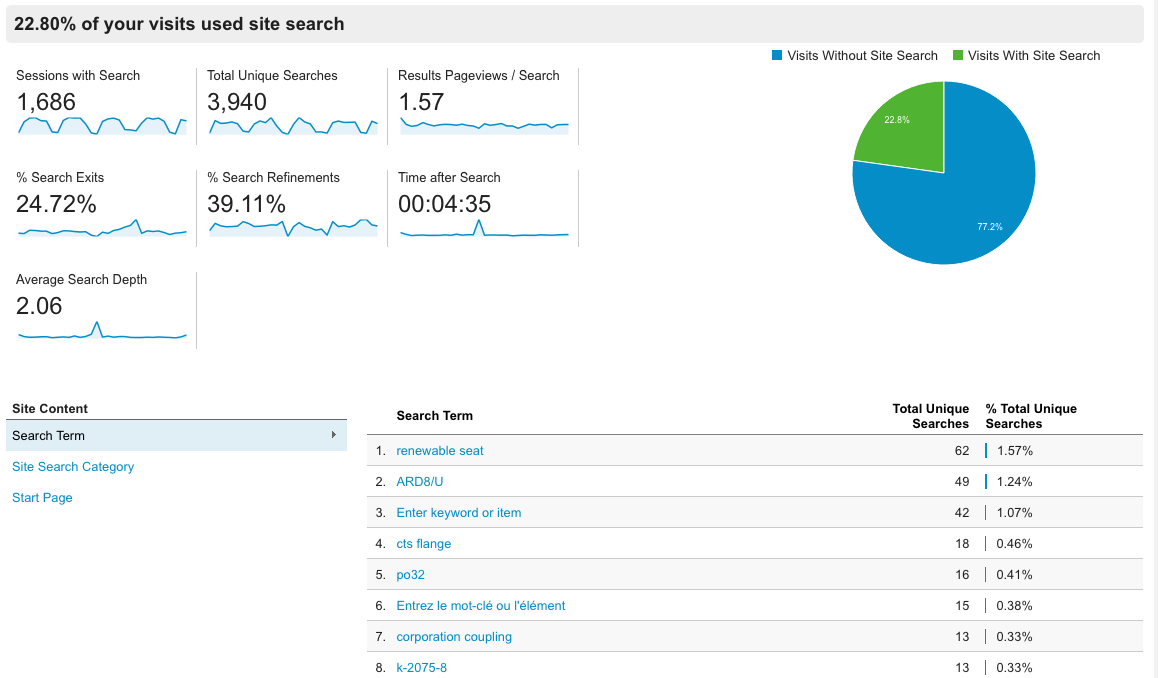
Example of the Google Analytics Site Search Tracking Reports:
Configure Tags, Triggers and Variables in Google Tag Manager
The following will explain the tags, triggers and variables B2B Commerce uses and how you can configure it in Google Tag Manager.
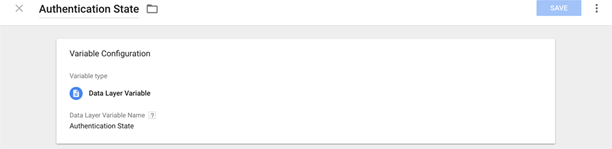
Variable - Authentication State
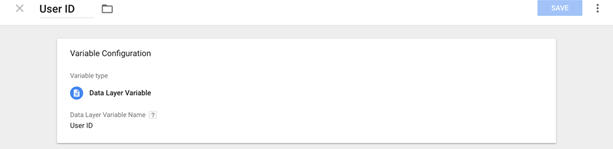
Variable - User ID
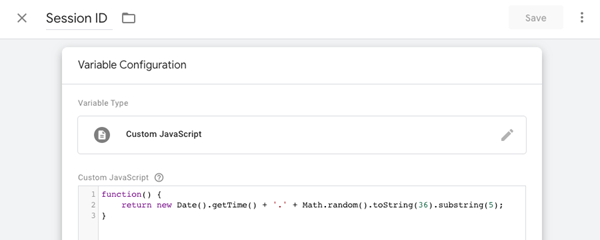
Variable - Session ID
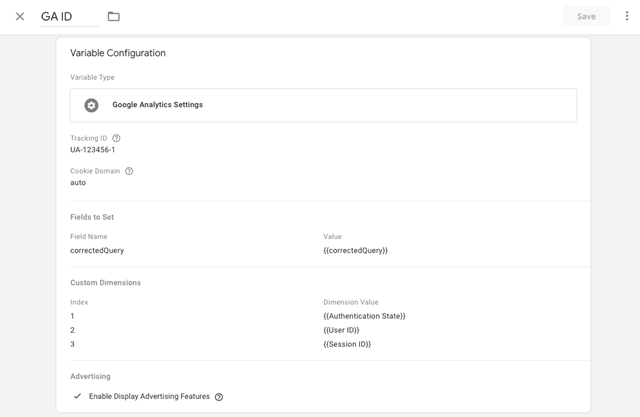
Variable - GA ID
Replace the Tracking ID with your own Google Analytics UA ID in the Google Analytics Admin page.
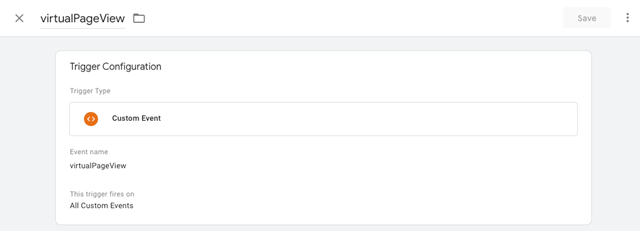
Trigger - virtualPageview
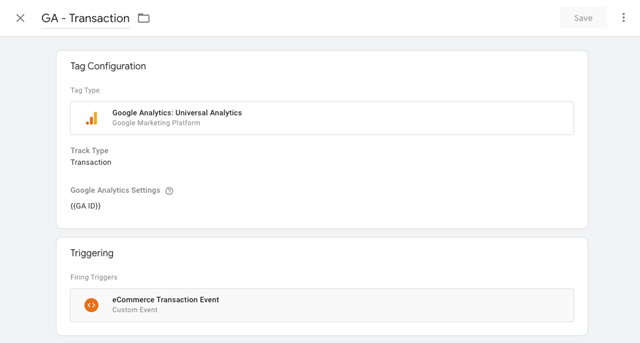
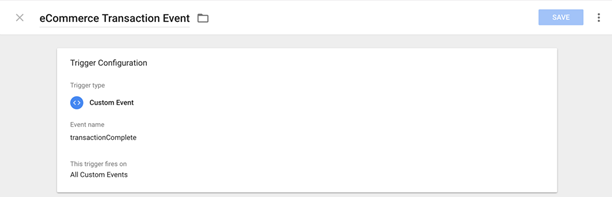
Trigger - eCommerce Transaction Event
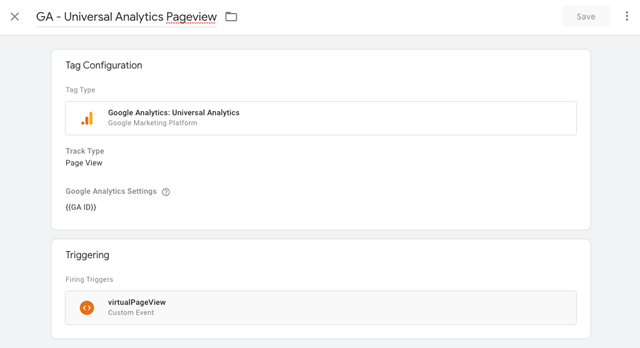
Tag - Universal Analytics Pageview
Replace the GoogleAnalytics Settings in the GA ID variable as listed below.
Tag - Google Analytics eCommerce
Replace the GoogleAnalytics Settings in the GA ID variable as listed below.