Commerce Settings for CMO Gadget
With EPiServer Campaign Monitor and Optimization (CMO) you can measure and monitor on your website and optimize your landing pages. EPiServer CMO provides a simple way to analyze campaigns and landing pages, rather than whole sites. Find out more about EPiServer CMO in the documentation on world.episerver.com.
EPiServer CMO can also be used for monitoring activities on an EPiServer Commerce site. You can for instance monitor the number of views or orders for a specific or product . The logging of Commerce data is supported using the Generic KPI function in CMO. The number of orders is an example of a generic KPI. This allows for external applications such as Commerce to send notifications using a specific application key. The application names and keys are defined in EPiServer CMO, which will then listen for incoming notifications with these specific key values, and collect and store the data.
The following procedure applies when setting up the integration between CMO and Commerce:
- Set up the web services to be used by EPiServer CMO and the corresponding to be used.
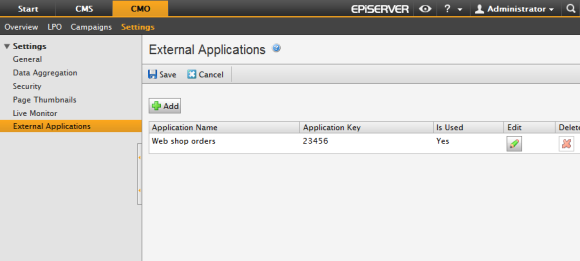
- Define the external applications, their application names and keys, in EPiServer CMO.
- Define the product views and/or product orders you want to monitor, using the EPiServer Commerce Settings for CMO . Here you will need the application keys and the URL for the CMO Web Services.
- In EPiServer CMO, create a campaign and add the generic KPI for EPiServer Commerce.
- EPiServer Commerce will update the KPI value using web services.
- The monitoring result will be displayed on the campaign report page in CMO, or by using the CMO KPI Summary gadget for EPiServer Commerce on the site that has the EPiServer CMO service installed.
The collected data for EPiServer Commerce is defined in the EPiServer using the Commerce settings for CMO gadget, as described in the following.
To use this gadget you need to have both EPiServer CMO and EPiServer Commerce installed on your website.
Adding the Commerce Settings for CMO Gadget
When you add and configure this gadget, you can choose to monitor activities for a selection of product(s) or order(s).
Do the following to add and configure the CMO gadget for EPiServer Commerce:
- Open the EPiServer OnlineCenter for your website(s) and select Add Gadgets.
- Click on the Commerce setting for CMO gadget to add it to your dashboard.
- Click Add to define the monitoring parameters.
- Select Type, choose either Product View or Product Order. The Product View will define views of a product or all products under a specific category (). The Product Order will define orders for one selected product or all orders of products under a specific category (node).
- In the Product/Category field, choose a product or a category by selecting an option in the tree structure on the left hand, and click Search in the area to the right. Select a product in the search list and click Select. Or, you can select an entire category (node). You can also search directly for a product name or ID. Click Select to add your selection.
- In the Application Key field, enter the application ID (defined in EPiServer CMO).
- In the URL for CMO Web Service field, enter the URL to be used by CMO for the web service (defined in EPiServer CMO).
Editing Commerce Settings for the CMO Gadget
Do the following to edit a set of settings for the CMO Gadget:
- Open the EPiServer OnlineCenter , and navigate to the Commerce settings for CMO gadget.
- Click the Edit icon for the settings you want to edit.
- Update the settings information, please refer to the section about adding the Commerce settings for CMO gadget.
- Click OK to save your changes.
Deleting Commerce Settings for the CMO Gadget
Do the following to delete the settings for the CMO Gadget:
- Open the EPiServer OnlineCenter Dashboard, and navigate to the Commerce settings for CMO gadget.
- In the check box to the left, select the set of settings you want to delete.
- Click the Delete button and click OK to confirm.
Version: EPiServer Commerce 1 R2 SP2| Last updated: 2012-09-20 | Copyright © EPiServer AB | Send feedback to us