 Configuring taxes
This topic is intended for administrators and developers with administration access rights in Optimizely.
You can configure taxes so that rates are calculated and added to the total price during the checkout Commerce: Completing a purchase on a website, involving the collection of shipping and billing address, shipping method, payment, and so on. process. You can combine and apply multiple taxes (such as federal, state and local tax) to a purchase.
Set up and maintain taxes with these methods:
- Creating or editing tax controls manually
- Importing taxes through a CSV file
- Exporting taxes through a CSV file
Defining countries and regions
To configure taxes, first define the countries and regions where you plan to sell products, using the correct country ISO codes for tax calculations to work properly (for example, during checkout). Countries and regions are defined through code, see Optimizely World for technical details.
Configuring taxes manually
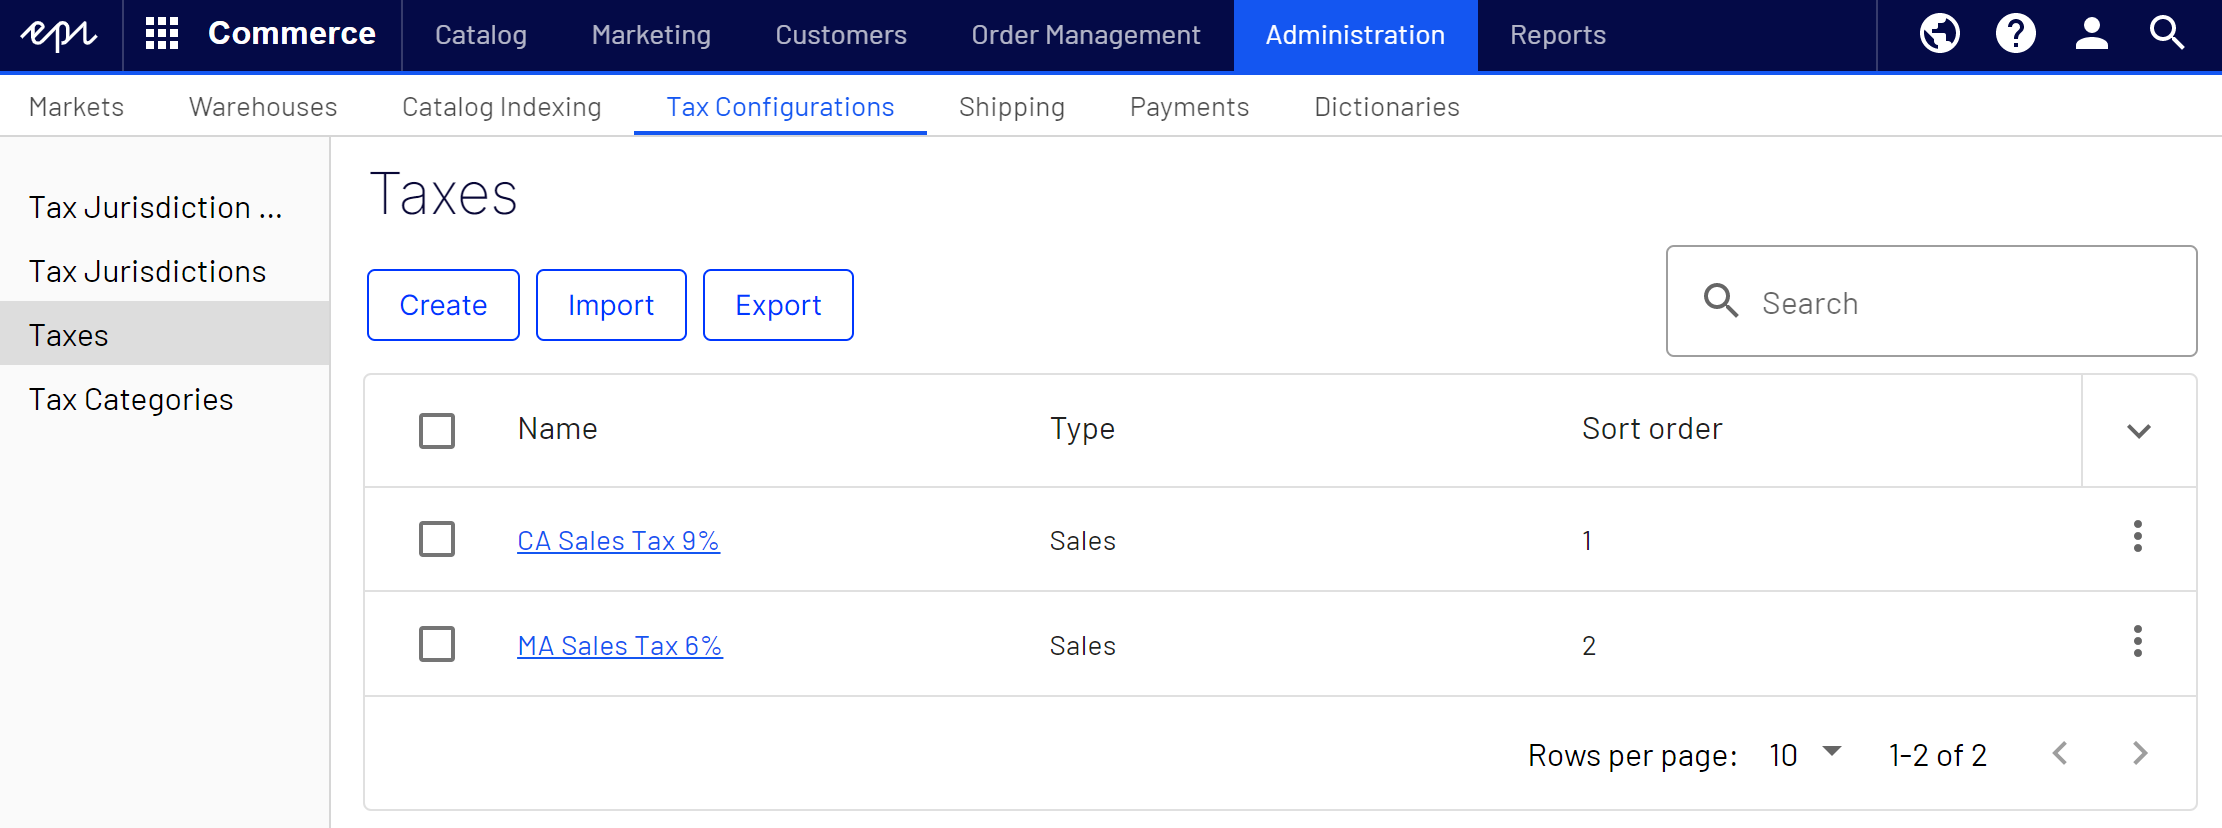
To set up taxes manually, open the Administration view, select Tax Configuration, and use the following steps.
- Create tax categories.
Select Tax Categories to create categories that are used to associate catalog items with defined tax rates. For example, you can create categories such as General Sales, Food, and Luxury items, depending on tax regulations for these item types.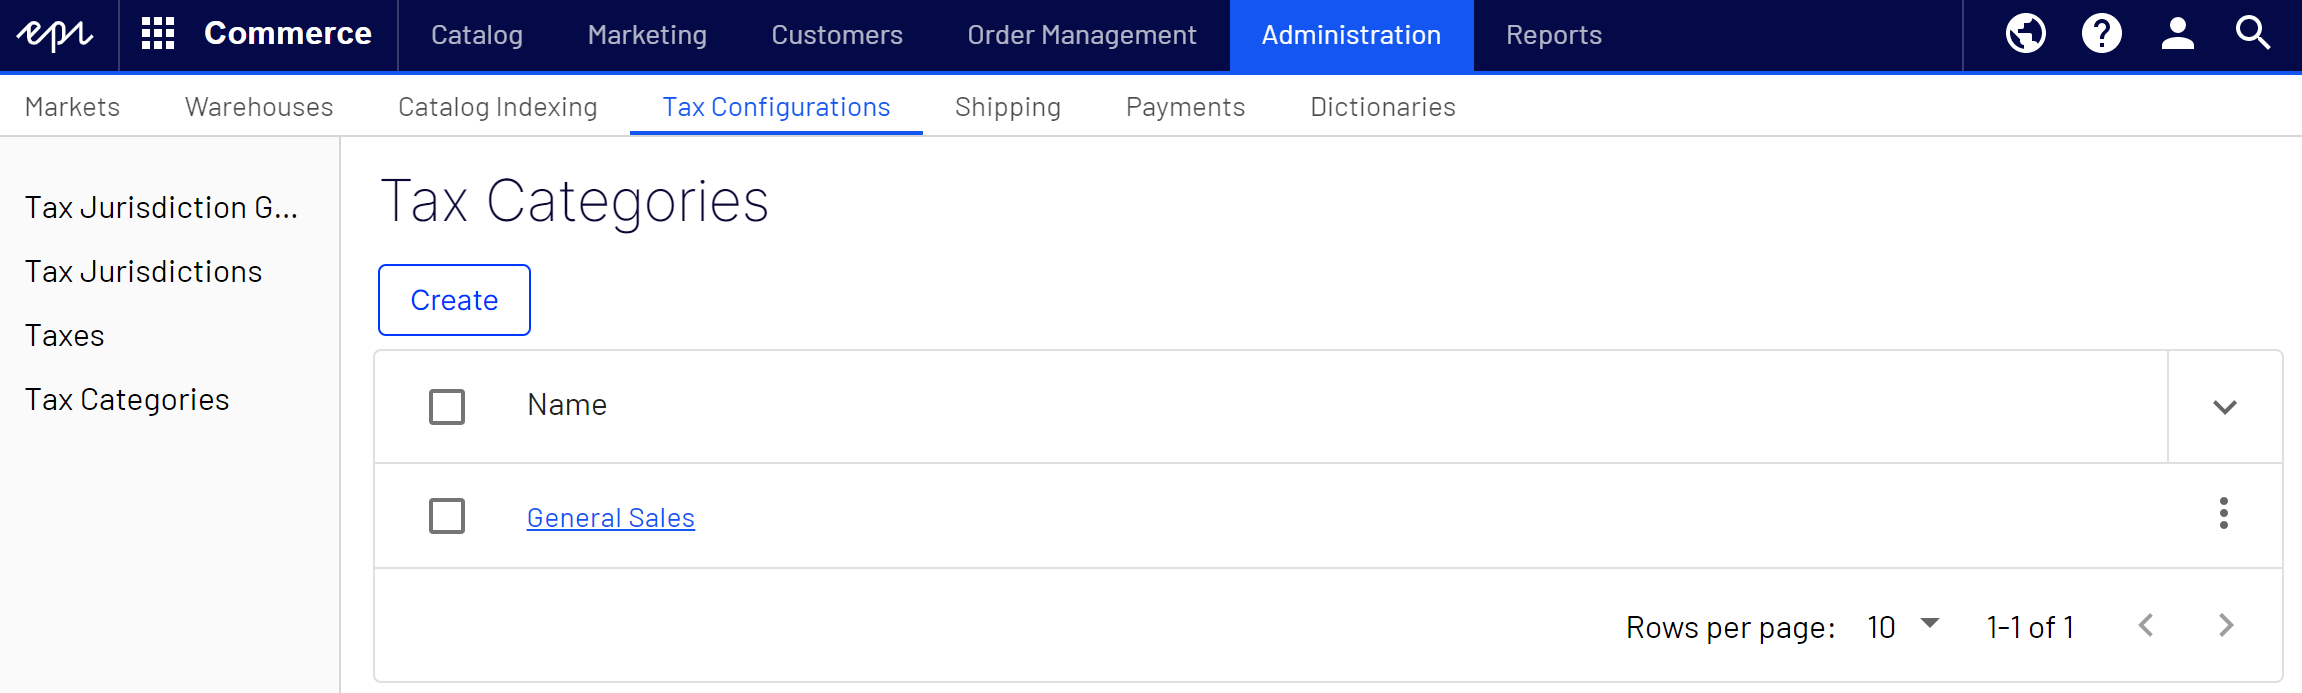
- Create and configure tax jurisdictions.
Select Tax Jurisdictions to specify particular jurisdictions for a region by defining zip codes, and country codes, and so on. Tax rates are applied to whatever level of information you specify for each jurisdiction. For example, if you specify only the country code as US, customers with a US address (regardless of state and county) are included in this jurisdiction.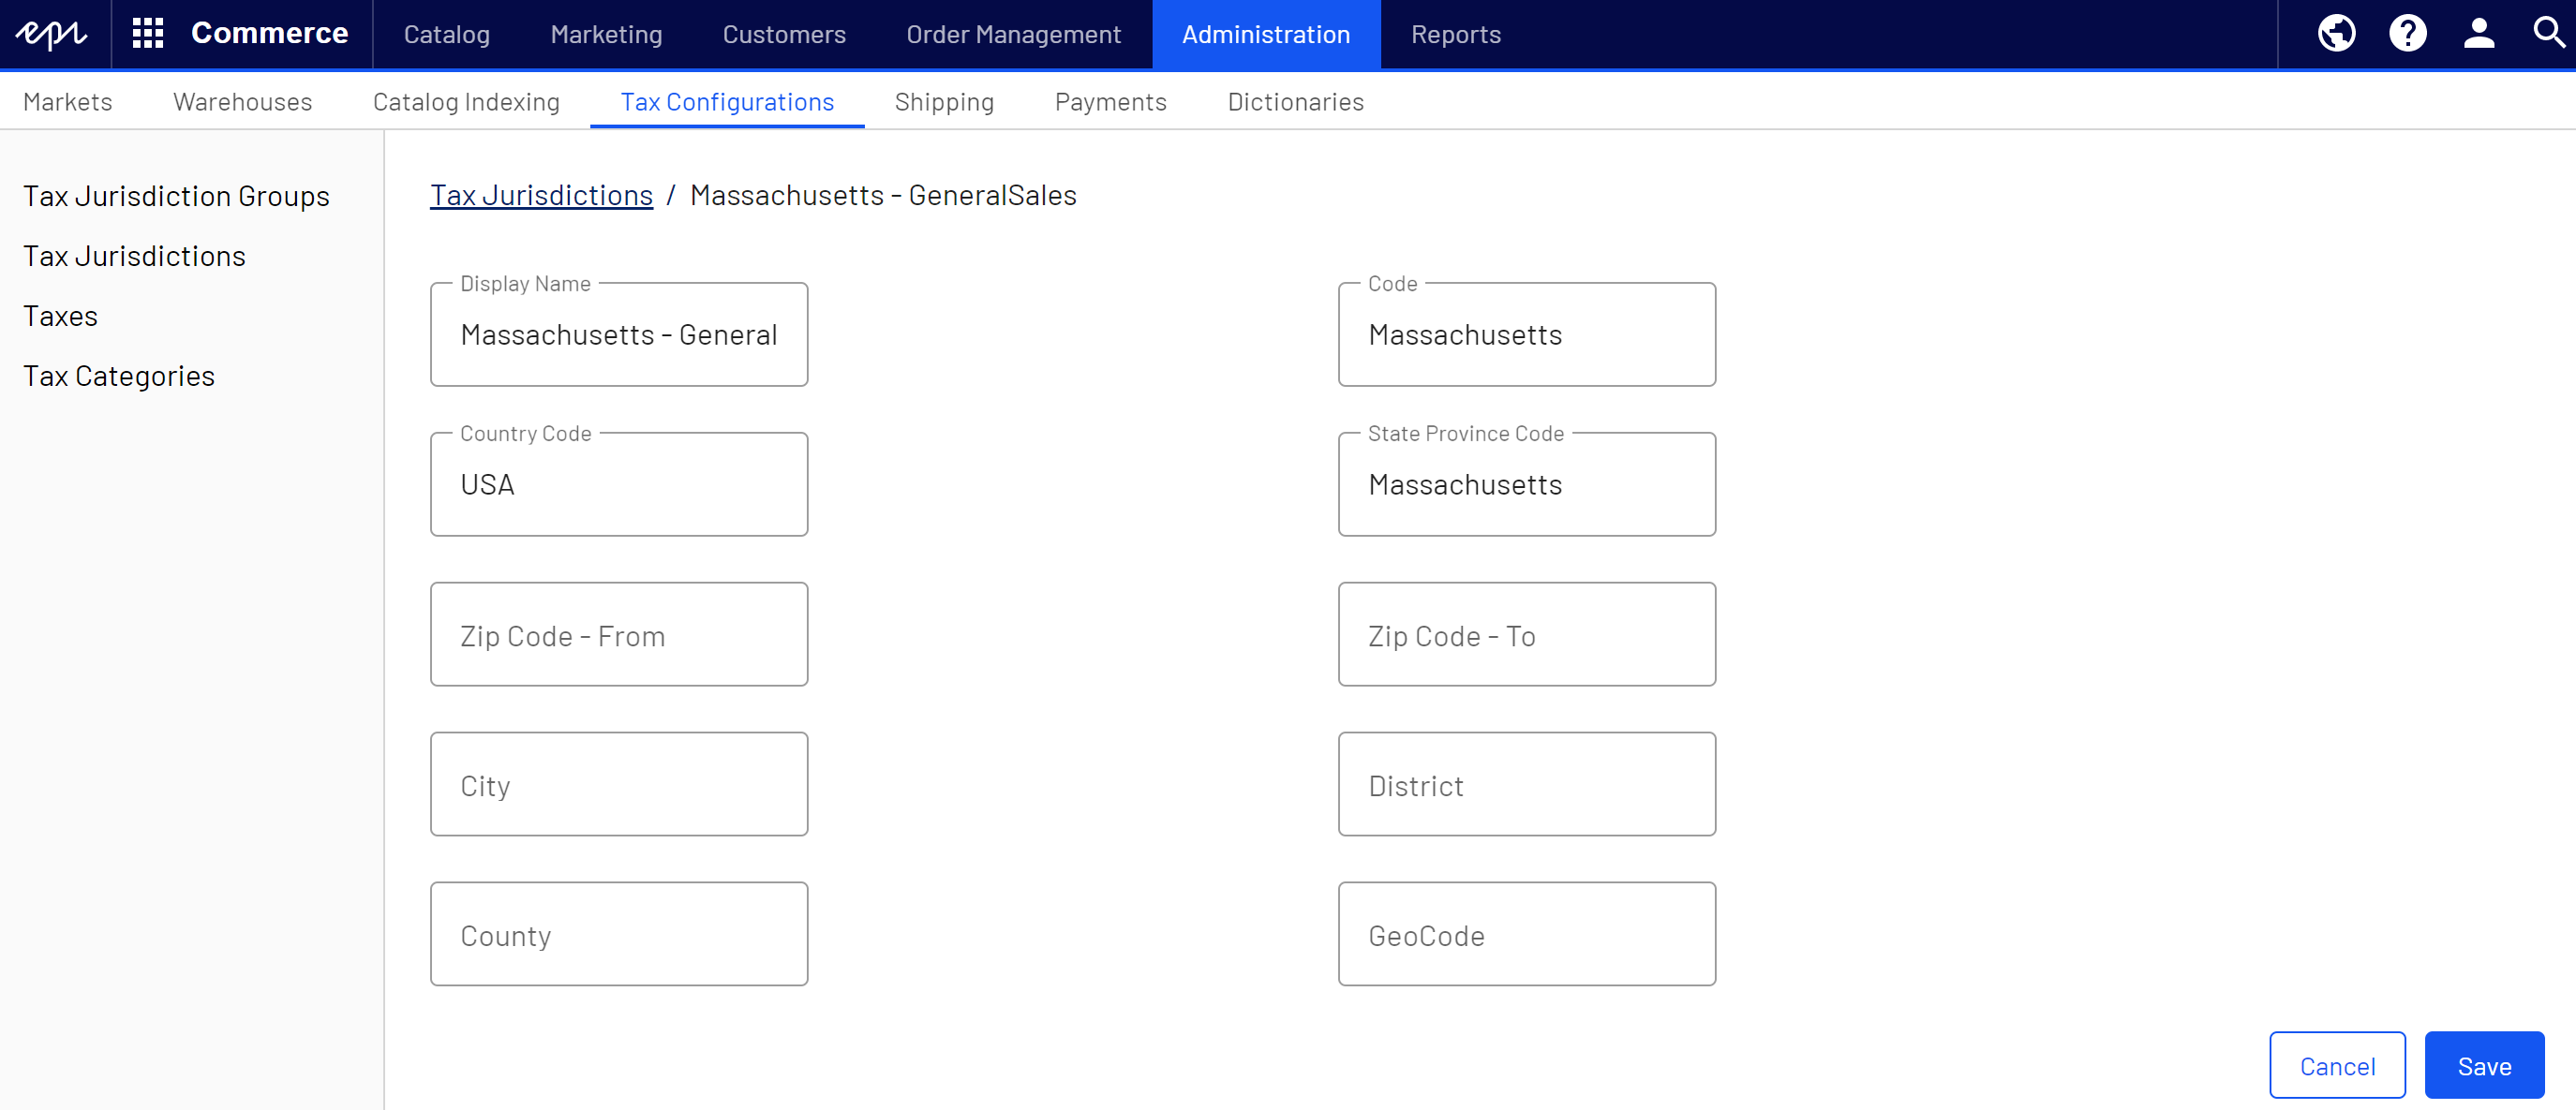
Country Code and Region Code entered here must match the codes used when defining countries and regions.
- Create and configure tax jurisdiction groups.
Select Tax Jurisdiction Groups to define groups of available tax jurisdictions. You can include multiple tax jurisdictions in a tax jurisdiction group.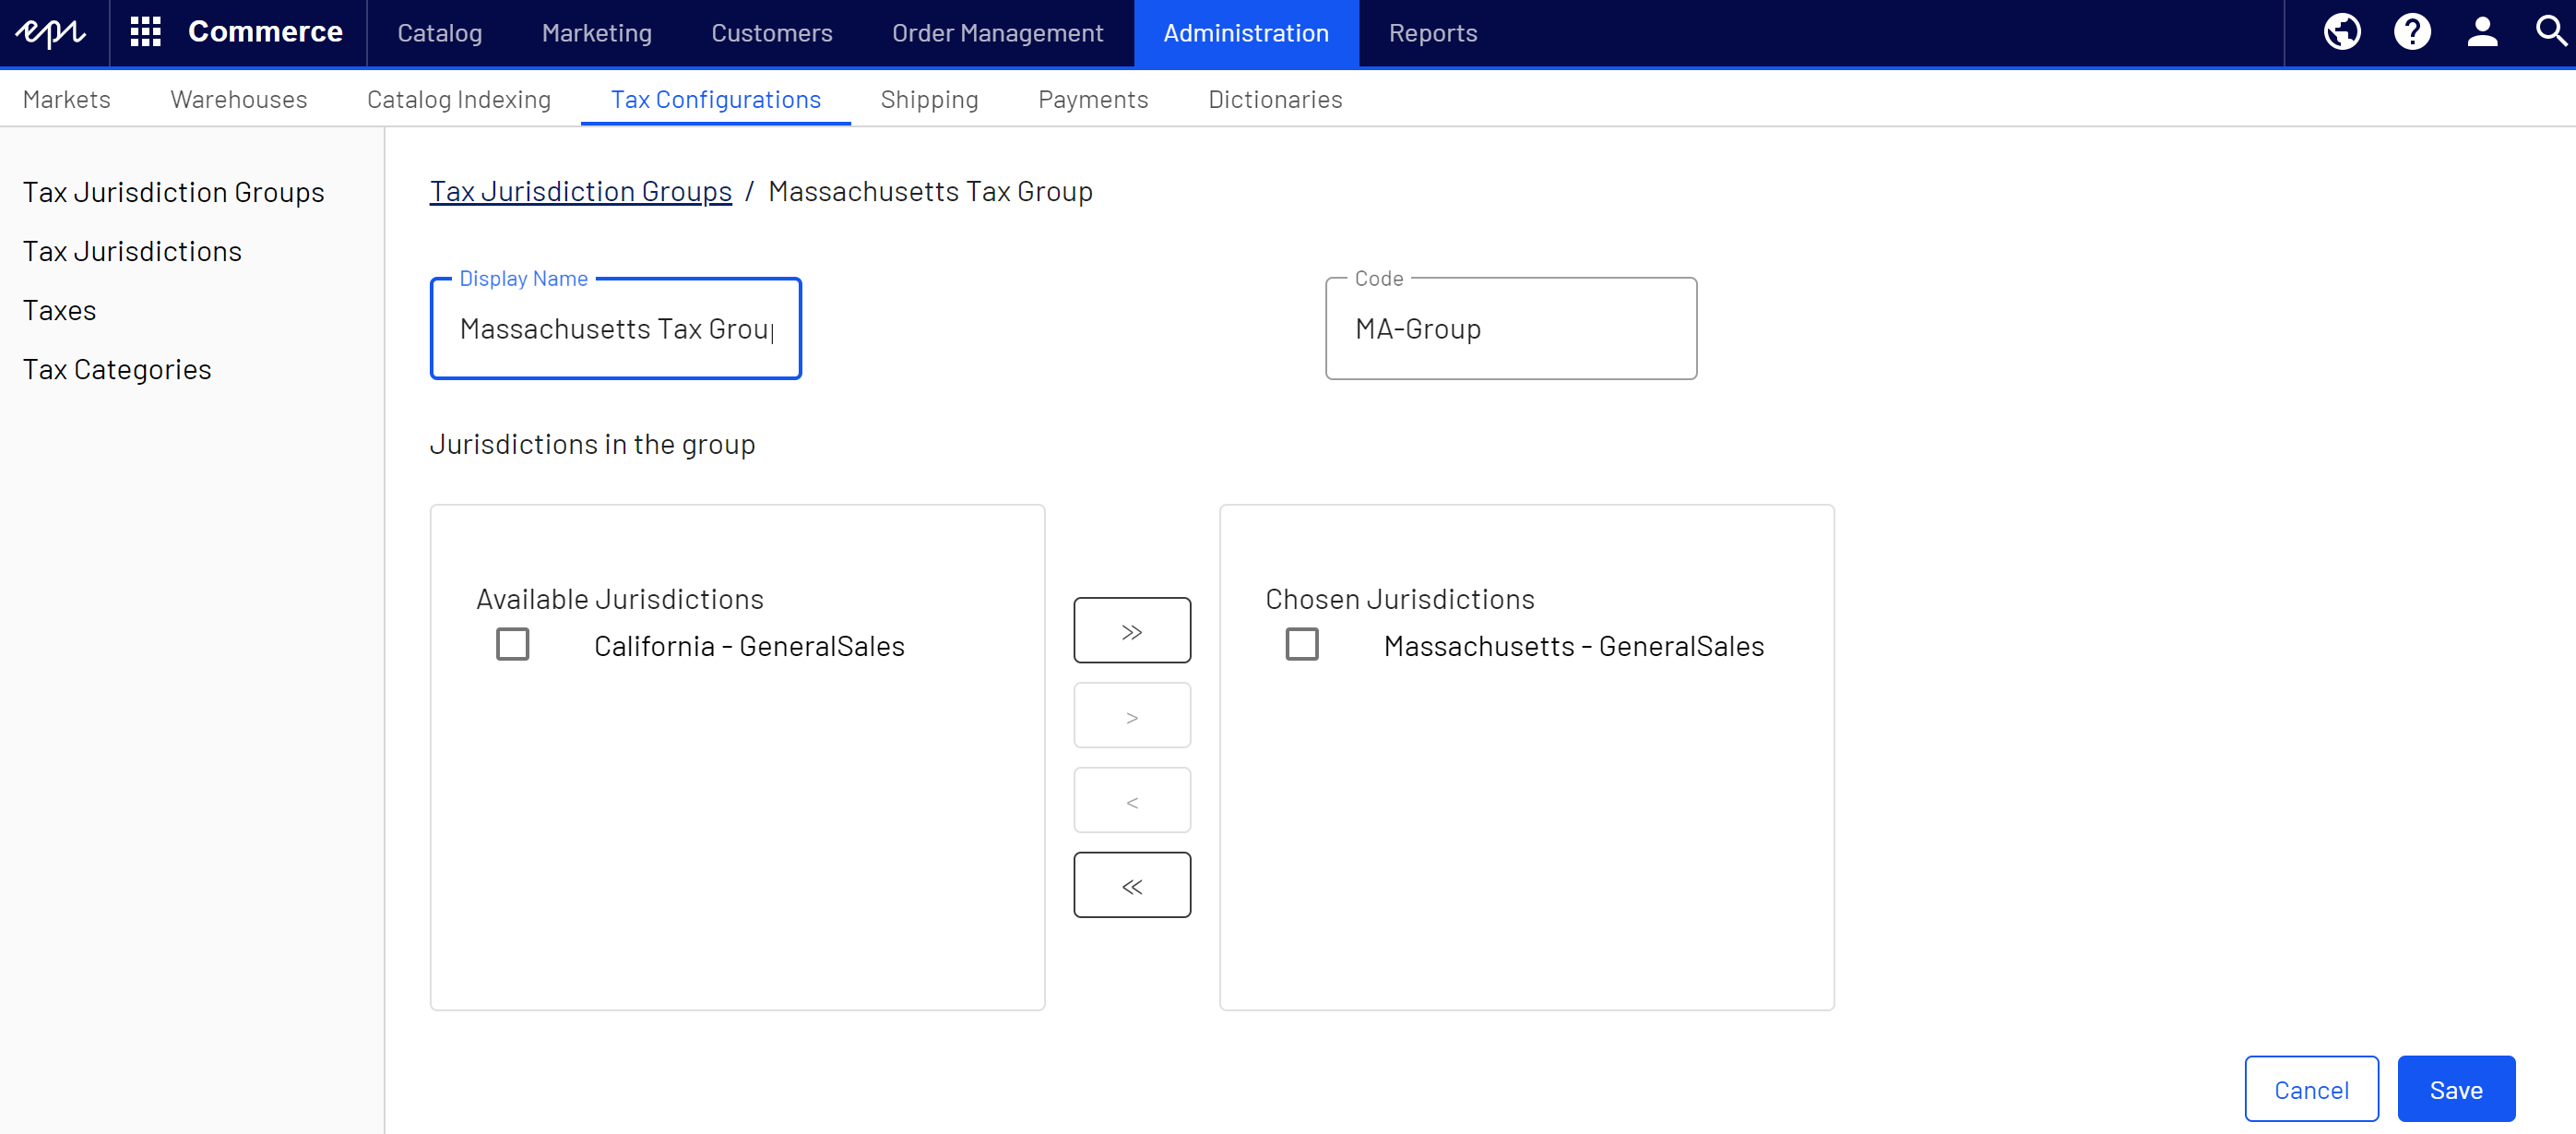
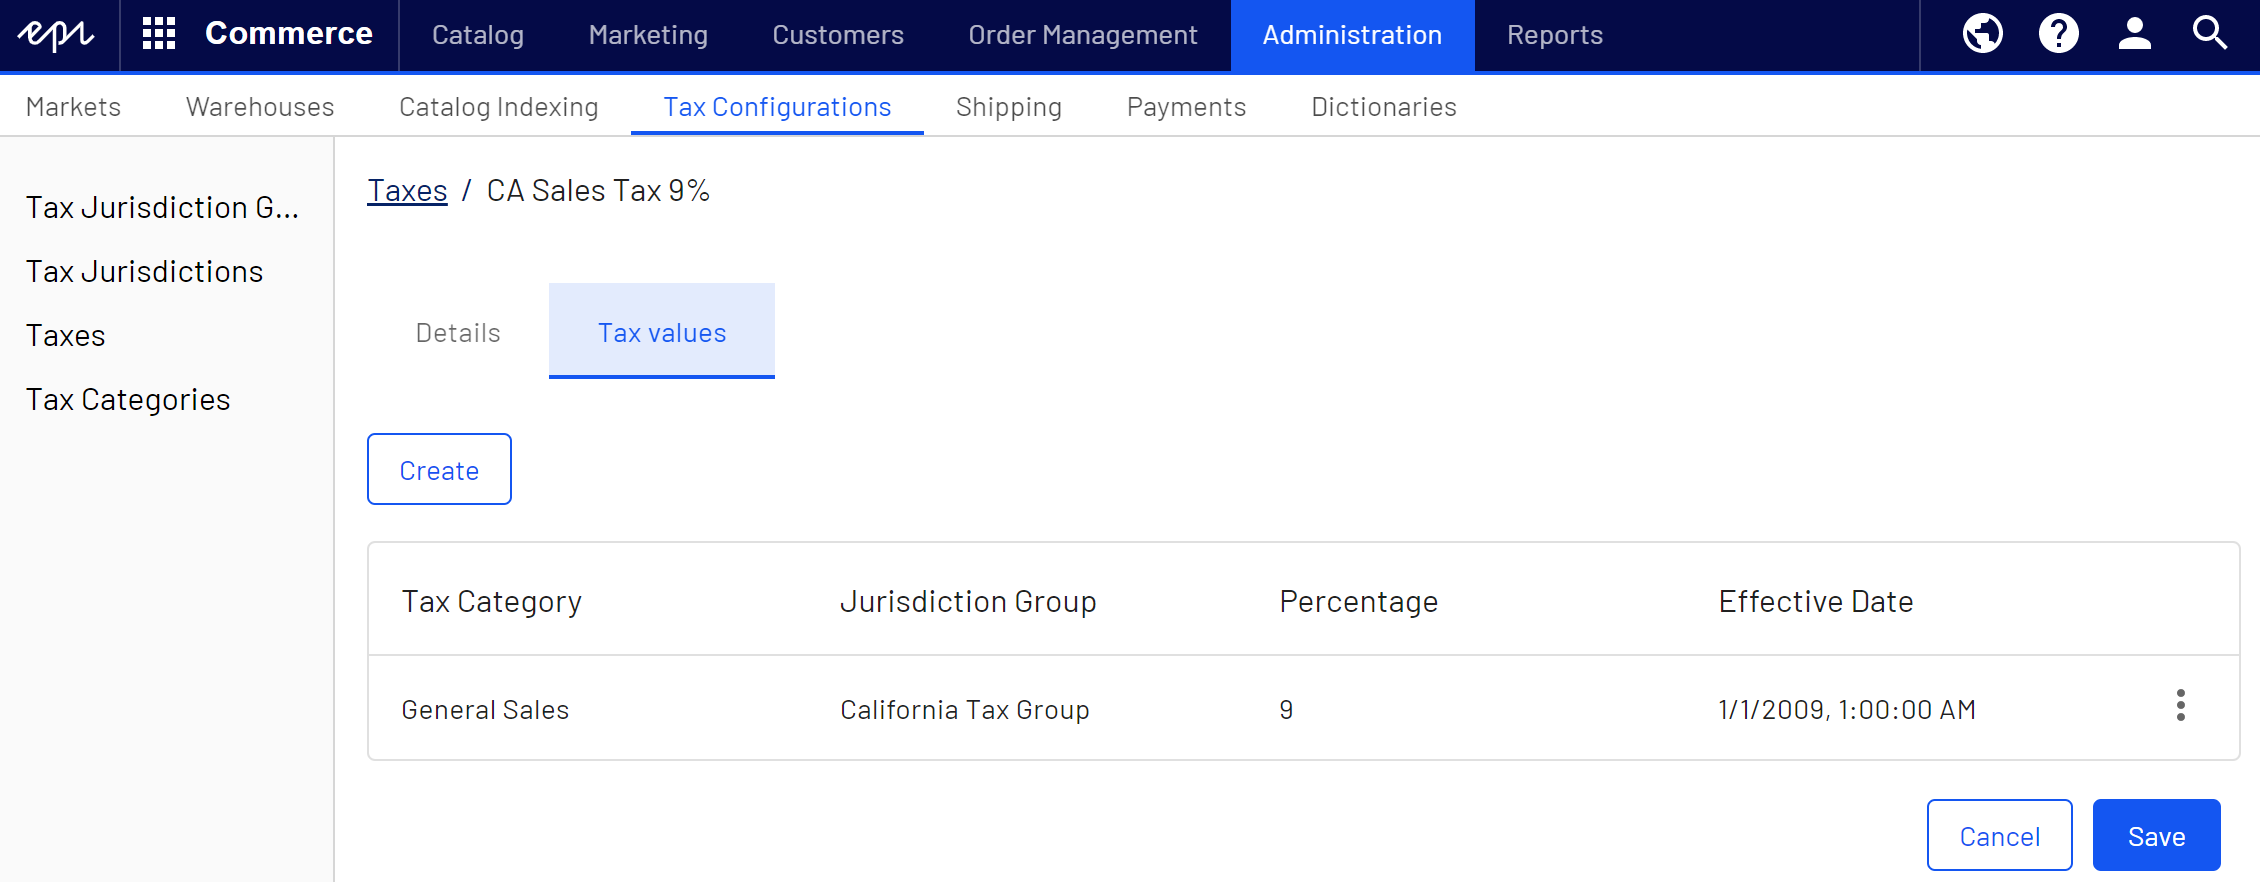
- Create and configure taxes.
Select Taxes and click Create to add a new one. Name the tax under Details. Under Tax values, specify the tax rate, and associate it with a tax category and jurisdiction group previously created.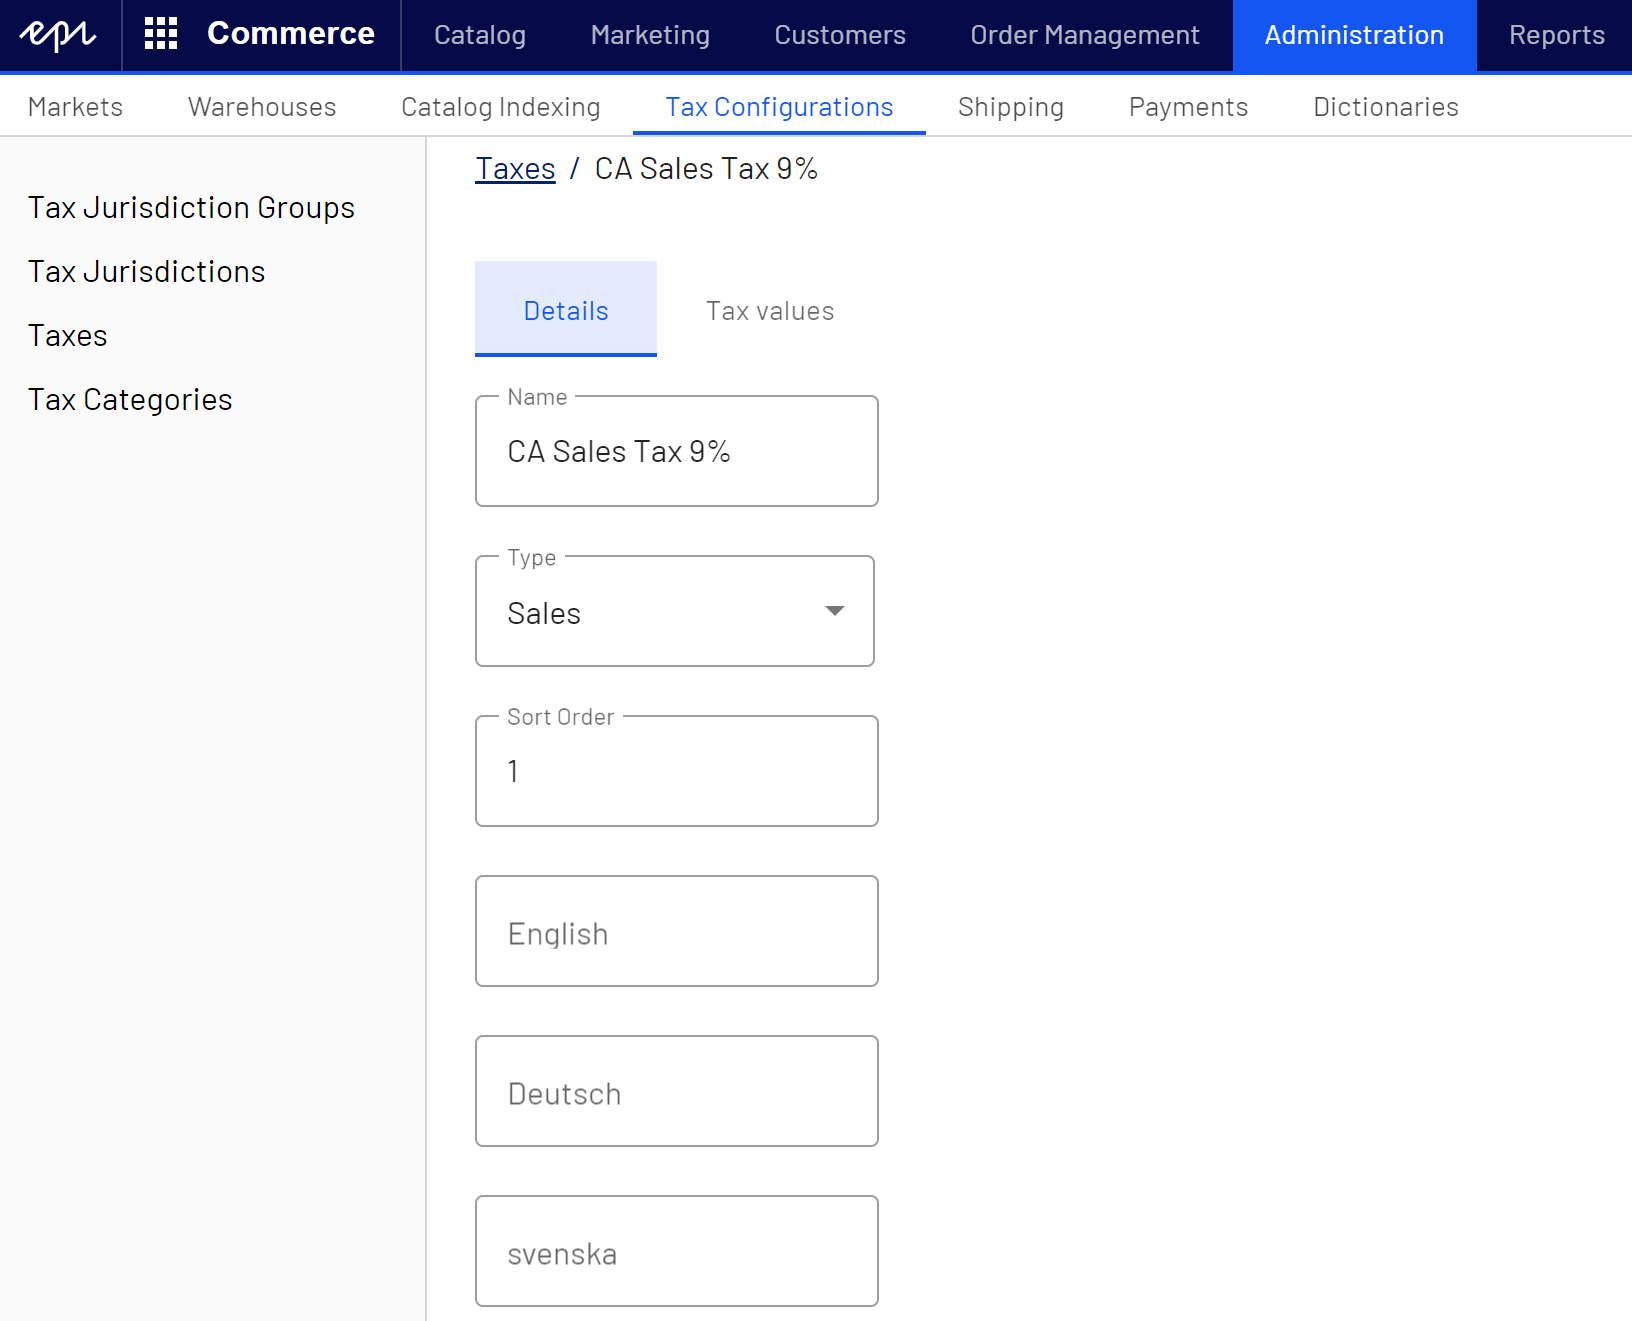
- Tax categories created here are available for selection under the Pricing tab for variations/SKUs in a catalog.

Configuring taxes through import/export
Using a CSV tax file with a specified format (see example scenarios), you can import and update tax data in bulk, replacing manual configuration steps. You can also use the CSV import to associate catalogs with tax categories.
Using a CSV tax file, you can also extract selected tax data from Commerce to export and copy tax data among sites. The format of the CSV export file matches the CSV file used for importing taxes.
Importing taxes
- In the Tax Configuration view, select Taxes and click Import.
- Click Add New File and Browse to select and upload your CSV tax file.
- Click Upload File and then Save The File. The CSV tax file appears in the Files Available for Import section.
- Select and highlight the CSV file and click Start Import.
- When the import is completed, the tax setup is available in Commerce.
To edit the existing setup, repeat the steps with a modified CSV file.
Re-importing a CSV file only edits existing information or adds new data - nothing is deleted. If you delete an entire row of data in the CSV file, you must manually delete those entries in Commerce. You can delete all the tax data and perform the CSV tax import from scratch.
Exporting taxes
- In the Tax Configuration view, select Taxes and click Export.
- Select the tax value that you want to export.
- Click Start Export.
- When the export is completed, the CSV file is available in the Exported Files List, located in [App_Data] \ImportExport\[ApplicationName]\taxexport\
Sample CSV files and scenarios
Example 1: Single tax per catalog item based on a single jurisdiction
If your variable is State, then you can specify the tax rate on a state-level. For example, CA is 9% and MA is 6%. If you placed an order from California, then 9% sales tax is applied during checkout.
| Jurisdiction | Jurisdiction Group | Tax Rate | Tax Category |
|---|---|---|---|
| California | CA Tax Group | 9% | General Sales |
| Massachusetts | MA Tax Group | 6% | General Sales |
See TaxCSVSample1.csv in this sample .zip file.
Example 2: Two or more taxes per catalog item based on more than one jurisdiction
If you have a luxury item that requires State and Federal tax, then you can specify tax rates on a state and federal level. For example, a luxury item purchased in CA has a 9% state tax rate and a federal tax rate of 3%. Both taxes are applied during checkout.
| Jurisdiction | Jurisdiction Group | Tax Rate | Tax Category |
|---|---|---|---|
| California General | CA GS Tax Group | 9% | General Sales |
| Massachusetts General | MA GS Tax Group | 6% | General Sales |
| California Luxury | CA LX Tax Group | 9% | Luxury Sales |
| Massachusetts Luxury | MA LX Tax Group | 6% | Luxury Sales |
| US Federal Luxury | US LX Tax Group | 3% | Luxury Sales |
See TaxCSVSample2.csv in this sample .zip file.
Example 3: Tax CSV file with tax type specified
You can specify the tax type. Optimizely provides Sales Tax and Shipping Tax.
| Jurisdiction | Jurisdiction Group | Tax Rate | Tax Category |
|---|---|---|---|
| California | CA Tax Group | 9% | Sales tax |
| Massachusetts | MA Tax Group | 6% | Shipping Tax |
See TaxCSVSample3.csv in this sample .zip file.