 Setting up a Triggered Messages campaign
Each Triggered Messages A product that lets you send automated personalized emails via an Email Service Provider (ESP), which are initiated by the the email recipient's on-site actions. campaign Personalization: Describes rules for sending automated personalized emails via an Email Service Provider (ESP) that are triggered by the on-site actions of the email recipient. must have an associated Email Service Provider (ESP) connection and ESP action (send mail, add to group, remove from group). Set up the ESP Stands for "email service provider" connection and the ESP action once, and these can act on all of your Triggered Messages campaigns. Furthermore, each Triggered Messages campaign must have an associated Email Product Recommendations A personalization feature that incorporates personalized product or content recommendations into dynamically-generated email. campaign that uses an appropriate trigger strategy. See Setting up a triggered Email Product Recommendations campaign.
Creating a new Triggered Messages campaign
Go to Triggered Messages in your Personalization Portal account. To create a new Triggered Messages A product that lets you send automated personalized emails via an Email Service Provider (ESP), which are initiated by the the email recipient's on-site actions. campaign, click Create a new campaign and fill out the form as follows:
- Enter a name for your Triggered Messages campaign, such as Test SendMessage.
- Select an ESP action so that the trigger performs the desired action when it fires.
- Optionally, specify start and end dates for the campaign.
- If you have a site in Optimizely with more than one language, such as a Swiss site that has French and German languages, you can set the Locale to fire triggered messages based on the locale, which sends emails in the correct language.
- Custom contact frequency appears only if you select the Send message action. Set it to On if you want the campaign to limit the number of times a trigger can fire for each customer A site visitor who has made a purchase on your website. from this Triggered Messages campaign Personalization: Describes rules for sending automated personalized emails via an Email Service Provider (ESP) that are triggered by the on-site actions of the email recipient..
If you turn on the Custom contact frequency, specify the maximum number of times that the trigger can be fired for each user by this campaign per day, per week, or per month.
In the screen image, the new trigger campaign specifies that for any visitor Someone who visits a website using a web browser. In most cases, a visitor can use public functions and services but cannot create content and has limited access to community content. In an SEO context, visitor means the number of visits to a URL through channels (external referrers), direct arrivals, and internal links. (See also visitor groups.), the trigger fires no more than 5 times per day, and no more than 20 times per week, and no more than 50 times per month (whichever limit is reached first).

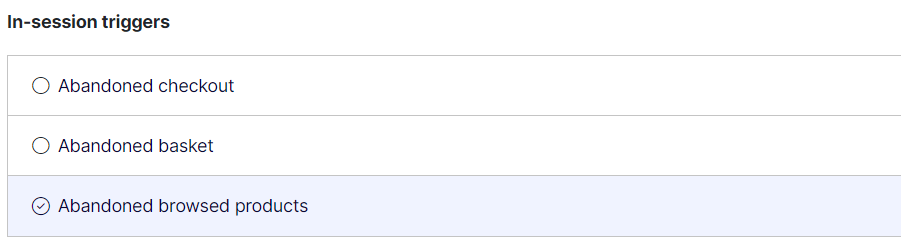
- Under Strategies, select the type of trigger this campaign should use:
- For In-session triggers, specify how long (in minutes) the visitor Someone who visits a website using a web browser. In most cases, a visitor can use public functions and services but cannot create content and has limited access to community content. In an SEO context, visitor means the number of visits to a URL through channels (external referrers), direct arrivals, and internal links. (See also visitor groups.) needs to be inactive on your site before the trigger can fire. Select a waiting time between 0 and 240 minutes.
- Unless stated otherwise, Daily triggers monitor the last 30 days of data. As soon as the trigger criteria are satisfied, the trigger fires. The following Repurchase strategy sends an email when a visitor has not purchased a recurring product that was expected to be purchased by a given date, such as when paper supplies run out.

- You can use Additional trigger actions alone or in combination with an In-session trigger. See Trigger action limits.
- You can specify whether the customer must have visited a certain page type a specified number of times.
- You can specify a URL Stands for "Uniform Resource Locator". Also known as a web address such as http://world.optimizely.com. (or a keyword from a URL) from your site that the customer must have visited.
The order of additional trigger actions does not matter.
To add a criterion, where the user must have NOT visited a certain page type or URL, you can enter the number of viewings as 0 (zero).

- Optionally, add any Expressions you want. Expressions let you further refine the criteria of a trigger, for example to fire only for special products, product categories, price thresholds or brands.

- Expressions only apply for the trigger Strategies (In-session trigger and Daily trigger), not for Additional trigger actions.
- A trigger fires only with products that match the Expressions filter. The following rules apply:
- If none of the products for the trigger (for example an In-session trigger for abandoned basket products) match the expression, the trigger will not fire.
- If only some products for the trigger (for example an In-session trigger for abandoned basket products) match the expression, the trigger will fire with only matching products.
You may have products whose prices change very frequently. To avoid sending a discount email every time a price reduction occurs for these products, you can use Expressions to limit the trigger requirements to selected products.
- Click Save campaign when you have completed your specifications.
- The initial state of a newly created trigger is OFF. To activate it, go to the Campaigns overview page and click the play button
 next to the campaign name.
Setting up an ESP connection
Optimizely must connect to the ESP Stands for "email service provider"’s API Stands for "application programming interface". The API specifies how some software components should interact with each other, such as accessing a database or computer hardware, or easing the work of programming graphical user interface components. APIs often are in the form of a library that includes specifications for routines, data structures, object classes, and variables. See also: https://world.optimizely.com/documentation/class-libraries/ so that when Triggered Messages A product that lets you send automated personalized emails via an Email Service Provider (ESP), which are initiated by the the email recipient's on-site actions. is fired, Optimizely can alert the ESP to perform an action.
- Go to Configuration > Triggered Messages in your Personalization Portal account.
- Select ESP connections.
- Edit an existing connection or create a new one. (To create a new connection, click Create an ESP connection.) The Manage your ESP connections screen appears.

- To create a connection:
- Enter your API credentials for your ESP account (such as username, password, database, realm, API token).
- Click Test ESP connection to test the connection.
- Click Save ESP connection.
Setting up an ESP action
- Go to Configuration > Triggered Messages in your Personalization Portal account and open a new or existing campaign.
- Select ESP actions. You can either edit an existing ESP Stands for "email service provider" action or create a new one. Make sure it uses the connection that you require, for example, the one you created or edited in Setting up an ESP connection.

- To create a new action, click Create an ESP action.
- Choose your preferred ESP action type from the available options and enter the required details (such as Group ID, List ID, Message ID, Database); the values of which are available from your ESP portal.
These fields are dynamic and differ depending on the chosen ESP connection and the chosen ESP action type.

Available action types are as follows:
Depending on the features supported by your ESP platform, some of these actions may not be available for your chosen connection.
- Remove user from group. Removes a user's email address from the group or list.
- Add user to group. A fired trigger A product that lets you send automated personalized emails via an Email Service Provider (ESP), which are initiated by the the email recipient's on-site actions. tells the ESP to add a user’s email address to the email group or list with the specified Group ID or List ID. If there are ESP-level triggers on the list, are be activated by this step. This action just adds a user's email addresses to a list; it does not send those users any emails.
- Send message. A fired trigger tells the ESP to send the message with the specified Message ID to the user.
Depending on your ESP, Send message may not check whether the user has opted in to the emailing scheme, so use it with caution.
- After you created your ESP action, test it and save it.
Linking to a specific basket
Optimizely can integrate links from an email recommendation to a particular basket of the recipient. To enable this feature, contact customer service.
For developer information, see Link to a specific basket on Optimizely World.