Setting up development and staging environments
You can set up your Ektron website in the following ways. You decide which configuration is the best fit for your particular situation.
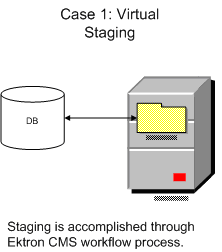
Virtual staging
Use Ektron’s approval process and scheduled publishing of content to manage when content goes live.
- Best choice when changes to templates and library files are infrequent
- No special implementation guidelines; just an installation on one server
- When upgrading this type of site, make a temporary copy of the site (both display layer and database) on a separate server to test the upgrade
Same server, same database
- Production and development/staging sites use separate copies of Ektron but reside on same server and point to same database
- Ektron’s settings, managed content, and library files are identical between sites

To set up this configuration:
- To maintain file paths between sites:
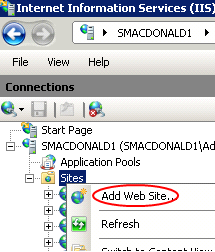
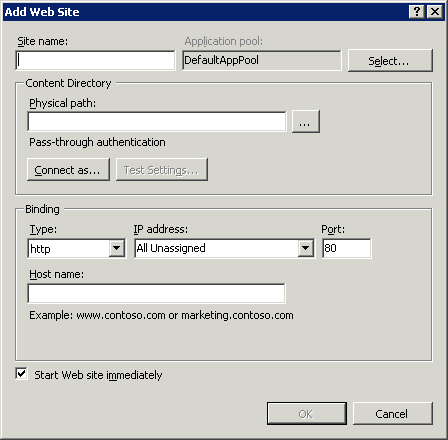
- Create separate websites in IIS.
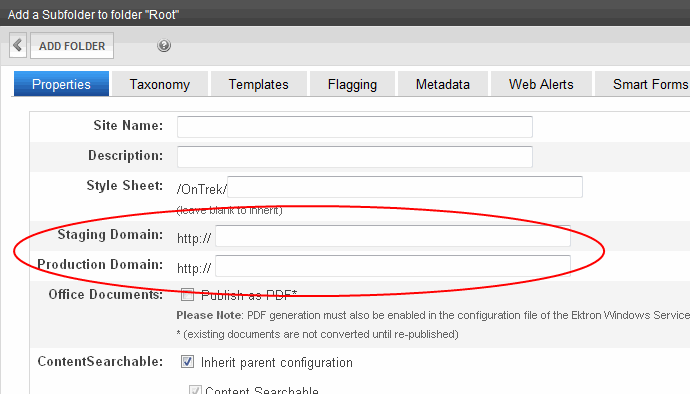
- Assign different ports to the production and development/staging sites. For example, the production site is
http://www.example.com, and the development/staging site ishttp://www.example.com:8080.
- Both sites must use the same pathing relative to the Web root. For example,
www.example.com\Workarea\applicationAPI.aspanddev.example.com\Workarea\applicationAPI.asp. - Because both sites use the same database, editing and publishing content on one site affects the other site. As a result, the development/staging server always has the freshest content.
- Make the Ektron
uploadedimages/anduploadedfiles/folders IIS virtual directories that point to the same physical directory. - Template changes must be copied between sites. The best way to copy site templates and other assetAn external file, such as a Microsoft Word document or image, stored in one of these Ektron siteroot folders: assets, privateassets, uploadedfiles and uploadedimages.
An asset can be managed like native Ektron content.s is eSync. This is described in Synchronizing servers using eSync.
- If eSync was not implemented and changes to these items are infrequent, you can manually copy them.
To test and QA an upgrade, make a temporary copy of the site’s display layer on a separate server connected to the development/staging database.
If the development/staging database is the master, back it up before upgrading.
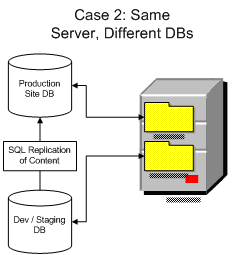
Same server, different databases
- Production and development/staging sites use separate copies of Ektron’s display layer, reside on same server, but point to different databases
- Changes to content, configuration, or library files made in one site must be copied to other site
To set up this configuration:
- To maintain file paths between sites:
- Create separate websites in IIS.
- Assign different ports to the production and development/staging sites. For example, the production site is
http://www.example.com, and the development/staging site ishttp://www.example.com:8080. - Separate the databases for isolation.
- One database is the master, and the other is a copy
- Only edit content in the site connected to the master database
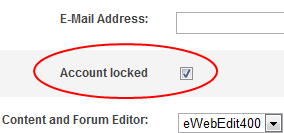
- Remove the Ektron login page from the site connected to the copy database
- To copy the Ektron database, your best choice is Ektron’s eSync feature. This is described in Synchronizing servers using eSync.
- If you have not implemented eSync, copy site content using a replication tool for the database.
- SQL Server 2008 SDK Replication: See SQL Server Replication.
- Library files. Make sure the Ektron
uploadedimages/anduploadedfiles/folders IIS virtual directories point to the same physical directory. - Templates and other file system assets—The best way to move these is eSync. If that was not implemented and changes to these items are infrequent, you can manually copy them. For automated replication, use a product such as Microsoft Application Center.
- Upgrading Ektron. To test an upgrade, make a temporary copy of the site’s display layer on a separate server connected to the development/staging database. If the development/staging database is the master, back it up before upgrading.
Separate servers, same database
- Production and development/staging sites reside on separate servers, which point to the same database.
- Ektron settings, content, and library files are identical between sites.
- Changes to templates must be copied between servers.

To set up this configuration:
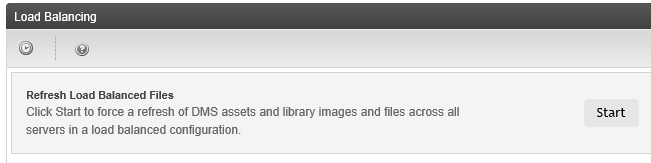
- Configure Ektron’s Load Balancing feature to copy uploaded images and files between the servers.
- The best way to move site templates and other assetAn external file, such as a Microsoft Word document or image, stored in one of these Ektron siteroot folders: assets, privateassets, uploadedfiles and uploadedimages.
An asset can be managed like native Ektron content.s is eSync. This is described in Synchronizing servers using eSync.
- If that was not implemented and changes to these items are infrequent, you can manually copy them. For automated replication, use a product like Microsoft Application Center.
- When upgrading Ektron:
- Back up the file system of the development/staging server.
- Make a temporary copy of the production server database.
- Switch the development/staging site to use the copy.
- Test and QA the upgrade on the development/staging server.
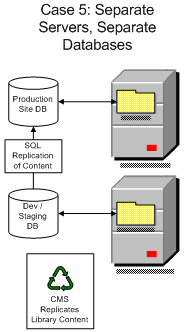
Separate servers, separate databases
- Production and development/staging sites are installed to separate servers and point to different databases
- Changes to content, configuration, or files must be copied between sites.
To set up this configuration:
- Both sites must have the same pathing relative to the Web root, for example,
www.example.com\Workarea\applicationAPI.aspanddev.example.com\Workarea\applicationAPI.asp. - Separate the databases for isolation.
- One database is the master, and the other is a copy
- Only edit content in the site connected to the master database
- Remove the Ektron login page from the site connected to the copied database
- The best way to copy site templates and library files is eSync. This is described in Synchronizing servers using eSync.
- If that was not implemented and changes to these items are infrequent, you can manually copy them. For automated replication, use a product like Microsoft Application Center.
- To copy the Ektron database (containing HTML and XML content), your best choice is Ektron’s eSync feature.
- If you have not implemented eSync, copy site content using a replication tool for the database, such as SQL Server 2008 SDK Replication. See SQL Server Replication.
- Make sure the Ektron
uploadedimages/anduploadedfiles/folders IIS virtual directories point to the same physical directory. - When upgrading Ektron:
- Back up the file system of the development/staging server
- Make a temporary copy of the production server database
- Switch the development/staging site to use the copy
- Test and QA the upgrade on the development/staging server
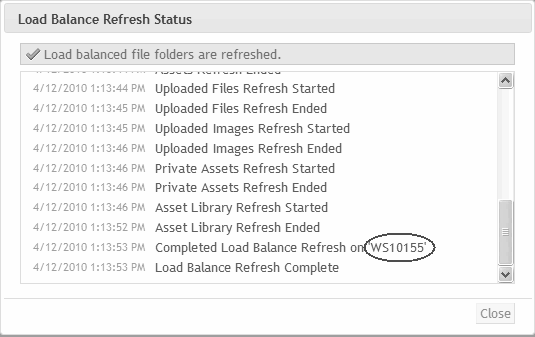
 ). The status screen shows either the previous refresh or the current refresh in progress
 ).
).